在项目开发中我们可能会碰到圆角ListView效果,因为直角的看起来确实不那么雅观,可能大家会想到用图片实现,试想上中下要分别做三张图片,这样做太繁琐,这时使用shape来实现不失为一种更好的实现方式。
先看一下Android 中Shape的使用方法:
solid:实心,就是填充的意思
android:color指定填充的颜色
gradient:渐变
android:startColor和android:endColor分别为起始和结束颜色,ndroid:angle是渐变角度,必须为45的整数倍。
另外渐变默认的模式为android:type="linear",即线性渐变,可以指定渐变为径向渐变,android:type="radial",径向渐变需要指定半径android:gradientRadius="50"。
stroke:描边
android:width="2dp" 描边的宽度,android:color 描边的颜色。
我们还可以把描边弄成虚线的形式,设置方式为:
android:dashWidth="5dp"
android:dashGap="3dp"
其中android:dashWidth表示'-'这样一个横线的宽度,android:dashGap表示之间隔开的距离。
corners:圆角
android:radius为角的弧度,值越大角越圆。
当然,这里并不是说这种圆角的列表一段是ListView来实现的,可能是由多个LinearLayout/RelativeLayout叠起来的。这个就看你怎么取舍了;如果列表项固定不怎么变化可以采取后者来实现比较好,如果需要动态变化那么使用ListView来实现更优。
下面来定义一下ListView只有一项时的背景(上下两个角都是圆角) app_list_corner_round.xml
<?xml version="1.0" encoding="utf-8"?>
<shape xmlns:android="http://schemas.android.com/apk/res/android"
 android:shape="rectangle" >

 <!-- 渐变 -->
 <gradient
  android:angle="270"
  android:endColor="@color/white"
  android:startColor="@color/white" />

 <!-- 圆角 -->
 <corners
  android:bottomLeftRadius="4dip"
  android:bottomRightRadius="4dip"
  android:topLeftRadius="4dip"
  android:topRightRadius="4dip" />

</shape>
ListView第一项的背景(上面是圆角,下面是直角) app_list_corner_round_top.xml
<?xml version="1.0" encoding="utf-8"?>
<shape xmlns:android="http://schemas.android.com/apk/res/android"
 android:shape="rectangle" >

 <gradient
  android:angle="270"
  android:endColor="@color/white"
  android:startColor="@color/white" />

 <corners
  android:topLeftRadius="@dimen/app_list_radius"
  android:topRightRadius="@dimen/app_list_radius" />

</shape>
ListView最后一项的背景(上面是直角,下面是圆角) app_list_corner_round_bottom.xml
<?xml version="1.0" encoding="utf-8"?>
<shape xmlns:android="http://schemas.android.com/apk/res/android"
 android:shape="rectangle" >

 <gradient
  android:angle="270"
  android:endColor="@color/white"
  android:startColor="@color/white" />

 <corners
  android:bottomLeftRadius="@dimen/app_list_radius"
  android:bottomRightRadius="@dimen/app_list_radius" />

</shape>
ListView中间项的背景(上下都是直角) app_list_corner_round_center.xml
<?xml version="1.0" encoding="utf-8"?>
<shape xmlns:android="http://schemas.android.com/apk/res/android"
 android:shape="rectangle" >

 <gradient
  android:angle="270"
  android:endColor="@color/white"
  android:startColor="@color/white" />

</shape>
接下来先看看Adapter的实现
package com.example.roundcorner.adapter;

import java.util.List;

import android.content.Context;
import android.view.LayoutInflater;
import android.view.View;
import android.view.ViewGroup;
import android.widget.BaseAdapter;
import android.widget.ImageView;
import android.widget.TextView;

import com.example.roundcorner.R;
import com.example.roundcorner.entity.ListBean;

public class ListAdapter extends BaseAdapter {
 private List<ListBean> mList;
 private Context mContext;

 public ListAdapter(Context mContext,List<ListBean> mList) {
 this.mList = mList;
 this.mContext = mContext.getApplicationContext();
 }

 @Override
 public int getCount() {
 return this.mList.size();
 }

 @Override
 public Object getItem(int position) {
 return this.mList.get(position);
 }

 @Override
 public long getItemId(int position) {
 return position;
 }

 @Override
 public int getItemViewType(int position) {
 // TODO Auto-generated method stub
 return super.getItemViewType(position);
 }

 @Override
 public int getViewTypeCount() {
 // TODO Auto-generated method stub
 return super.getViewTypeCount();
 }

 @Override
 public View getView(int position, View convertView, ViewGroup parent) {
 ViewHolder holder = null;
 if (convertView == null) {
 holder = new ViewHolder();
 convertView = LayoutInflater.from(this.mContext).inflate(
  R.layout.listview_item, null, false);
 holder.textView = (TextView) convertView
  .findViewById(R.id.listview_item_textview);
 holder.imageView = (ImageView) convertView
  .findViewById(R.id.listview_item_imageview);
 convertView.setTag(holder);
 } else {
 holder = (ViewHolder) convertView.getTag();
 }

 if(position==0){

 if(position == getCount()-1){ //只有一项
 convertView.setBackgroundResource(R.drawable.app_list_corner_round);
 }else{ //第一项
 convertView.setBackgroundResource(R.drawable.app_list_corner_round_top);
 }
 }else if(position == getCount()-1){
 convertView.setBackgroundResource(R.drawable.app_list_corner_round_bottom);
 }else{
 convertView.setBackgroundResource(R.drawable.app_list_corner_round_center);
 }

 ListBean lb = mList.get(position);
 holder.textView.setText(lb.getKey());

 return convertView;
 }

 static class ViewHolder {
 TextView textView;
 ImageView imageView;
 }
}
listview_item.xml
<?xml version="1.0" encoding="utf-8"?>
<RelativeLayout xmlns:android="http://schemas.android.com/apk/res/android"
 android:layout_width="match_parent"
 android:layout_height="wrap_content">

 <TextView
  android:id="@ id/listview_item_textview"
  android:layout_width="wrap_content"
  android:layout_height="48dp"
  android:paddingLeft="10dp"
  android:gravity="center_vertical"
  android:layout_centerVertical="true"
  android:text="A-H"
  android:textColor="@color/black"
  android:textSize="20sp" />

 <ImageView
  android:id="@ id/listview_item_imageview"
  android:layout_width="wrap_content"
  android:layout_height="wrap_content"
  android:src="@drawable/arrow"
  android:layout_alignParentRight="true"
  android:layout_centerVertical="true"
  />

</RelativeLayout>
最后看看主界面Activity的实现
package com.example.roundcorner;

import java.util.ArrayList;
import java.util.List;

import android.app.Activity;
import android.os.Bundle;
import android.widget.ListView;

import com.example.roundcorner.adapter.ListAdapter;
import com.example.roundcorner.entity.ListBean;

public class MainActivity extends Activity {

 private List<ListBean> data;

 @Override
 protected void onCreate(Bundle savedInstanceState) {
 super.onCreate(savedInstanceState);
 setContentView(R.layout.activity_main);

 initData();

 findView();
 }

 private void findView() {
 ListView mListView = (ListView) findViewById(R.id.mListView);

 ListAdapter mAdapter = new ListAdapter(this,data);
 mListView.setAdapter(mAdapter);
 }

 private void initData() {
 data = new ArrayList<ListBean>();
 for (int i = 0; i < 5; i  ) {
 ListBean lb = new ListBean();
 lb.setKey("设置 " i);
 data.add(lb);
 }
 }

}
activity_main.xml
<LinearLayout xmlns:android="http://schemas.android.com/apk/res/android"
 xmlns:tools="http://schemas.android.com/tools"
 android:layout_width="match_parent"
 android:layout_height="match_parent"
 android:orientation="vertical"
 tools:context=".MainActivity" >

 <TextView
  android:layout_width="match_parent"
  android:layout_height="48dp"
  android:background="@color/white"
  android:gravity="center"
  android:text="设置"
  android:textSize="20sp" />

 <RelativeLayout
  android:layout_width="match_parent"
  android:layout_height="match_parent"
  android:padding="10dp" >

  <ListView
   android:id="@ id/mListView"
   android:layout_width="match_parent"
   android:layout_height="wrap_content"
   android:background="@drawable/app_list_round"
   android:cacheColorHint="@android:color/transparent"
   android:divider="@drawable/app_list_divider"
   android:dividerHeight="2dip"
   android:padding="2dp" />
 </RelativeLayout>

</LinearLayout>
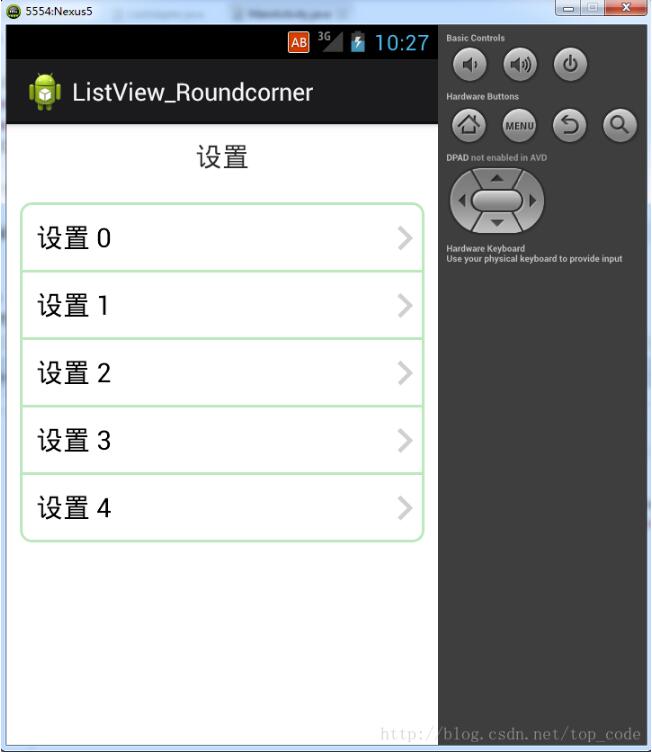
最后看看实现的效果
以上就是本文的全部内容,希望对大家的学习有所帮助,也希望大家多多支持Devmax。