TextView是Android中最简单也是最常见的控件。今天小空就带大家会会她。
👉实践过程
😜初识
经过前两篇常用属性和不常用属性的讲解,是不是有些懵了,不要慌,真实开发中用到的属性其实连五分之一都到不了。
我们先来创建个基本的文本控件
<?xml version="1.0" encoding="utf-8"?>
<RelativeLayout xmlns:android="http://schemas.android.com/apk/res/android"
    xmlns:app="http://schemas.android.com/apk/res-auto"
    xmlns:tools="http://schemas.android.com/tools"
    android:layout_width="match_parent"
    android:layout_height="match_parent"
    tools:context=".TextActivity">

    <TextView
        android:layout_width="match_parent"
        android:layout_height="200dp"
        android:text="爱是一道光,绿到你发慌"
        android:textColor="#00ff00"
        android:textSize="20sp" />
</RelativeLayout>
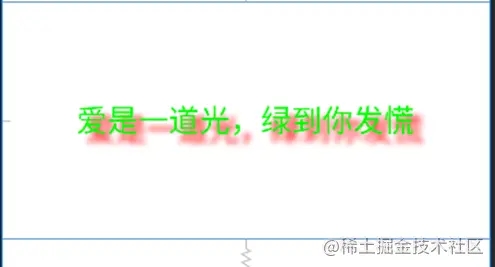
结合上面属性列表,运行效果是这样的:

那上面代码写的对吗?
对,一点都没错,否则怎么能看到效果了。
那还有更好的方式吗?
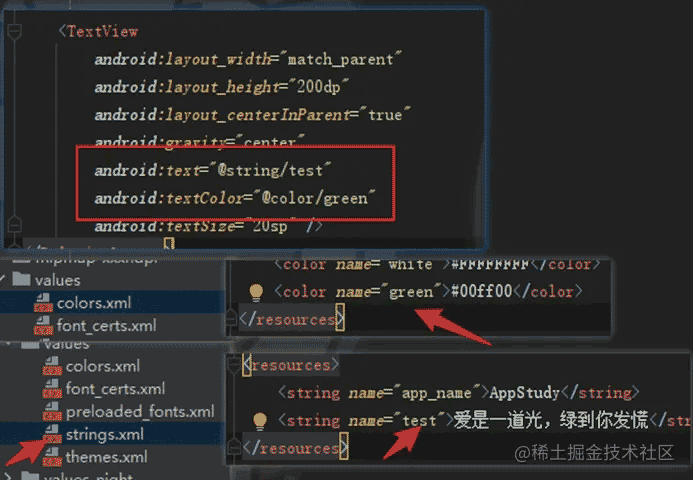
有,就是将text和textColor提出来,放到专门的文件里,text在【res-values-strings.xml中】,textColor在【res-values-colors.xml】中。
那么我们这么做的好处是什么呢?
你想象下有这么个场景:不同的页面都有相同的文本,在不同的页面布局有对应的TextView,这就存在多个text,当有一天需要修改这个文本的时候,你难道每个文本都改一遍(其实完全可以)?但是如果我们把text提出到【strings.xml】中,所有页面都能引用,以后遇见修改只需要修改【strings.xml】中的那一个文本就行了。
这就是文本配置文件,同理color是在颜色配置文件中【colors.xml】。
解决国际化需求也只需要再提供一个英文的【string.xml】即可。
😜文字阴影
某天,产品经理过来提需求了:小空啊,文本看起来一般啊,咱能更强大些吗?比如,立体些,你知道的,那样更有吸引力。
小空不搭理他,直接反手就是代码,必须要用该属性秀他一脸。
- android:shadowColor:设置阴影颜色
- android:shadowRadius:设置阴影模糊程度,必须要有该属性
- android:shadowDx :设置阴影在水平方向的偏移,向右为正,向左为负
- android:shadowDy:设置阴影在竖直方向的偏移,向下为正,向上为负
<TextView
    android:id="@ id/myTest"
    android:layout_width="match_parent"
    android:layout_height="200dp"
    android:layout_centerInParent="true"
    android:layout_gravity="bottom"
    android:gravity="center"
    android:text="@string/test"
    android:textStyle="normal"
    android:shadowColor="#ff0000"
    android:shadowRadius="10"
    android:shadowDx="20"
    android:shadowDy="20"
    android:textColor="@color/green"
    android:textSize="26sp" />
以上就是Android开发手册TextView控件及阴影效果实现的详细内容,更多关于Android开发TextView控件阴影效果的资料请关注Devmax其它相关文章!