1. 初始化vite项目
npm init vite
✔ Project name: … vite-project // 项目名称,默认 vite-project
✔ Select a framework: › react  // 选择框架
✔ Select a variant: › react-ts // 选择组合
2. 添加eslint
安装
npm i -D eslint
初始化eslint配置
npx eslint --init
✔ How would you like to use ESLint?
// To check syntax, find problems, and enforce code style
✔ What type of modules does your project use?
// JavaScript modules (import/export)
✔ Which framework does your project use?
// react
✔ Does your project use TypeScript?
// Yes
✔ Where does your code run?
// browser
✔ How would you like to define a style for your project?
// Use a popular style guide
✔ Which style guide do you want to follow?
// Airbnb
✔ What format do you want your config file to be in?
// JavaScript
解决eslint报错
Missing semicolon.eslint: 末尾加上;即可
JSX not allowed in files with extension '.tsx': 在.eslintrc.json中添加rules设置
{
    // ...
    "react/jsx-filename-extension": [
        "error",
        {
            "extensions": [".js", ".jsx", ".tsx", ".ts"]
        }
    ]
};
{count} must be placed on a new line: 代码换行即可;
Unable to resolve path to module './App': 在.eslintrc.json中添加rules设置
{
    // ...
    rules: {
         "import/no-unresolved": "off",
         "import/extensions": "off",
         "import/no-absolute-path": "off"
    },
};
'vite' should be listed in the project's dependencies, not devDependencies.:
在.eslintrc.json中添加rules设置
{
    // ...
    "rules": {
        "import/no-extraneous-dependencies": [
            "error",
            {"devDependencies": true}
        ]
        // ...
    }
};
3. 添加 prettier
安装
npm i -D prettier eslint-config-prettier eslint-plugin-prettier
prettier: 核心模块
eslint-config-prettier: 关闭所有不必要或可能跟prettier产生冲突的规则
eslint-plugin-prettier: 可以让eslint使用prettier规则进行检查
配置
根目录下.eslintrc.json文件中添加extends设置
{
    // ...
    "extends": [
        // ...
        "plugin:prettier/recommended",
    ],
}
根目录下创建.prettierrc.json文件
{
  "trailingComma": "es5",
  "tabWidth": 2,
  "semi": true,
  "singleQuote": true
}
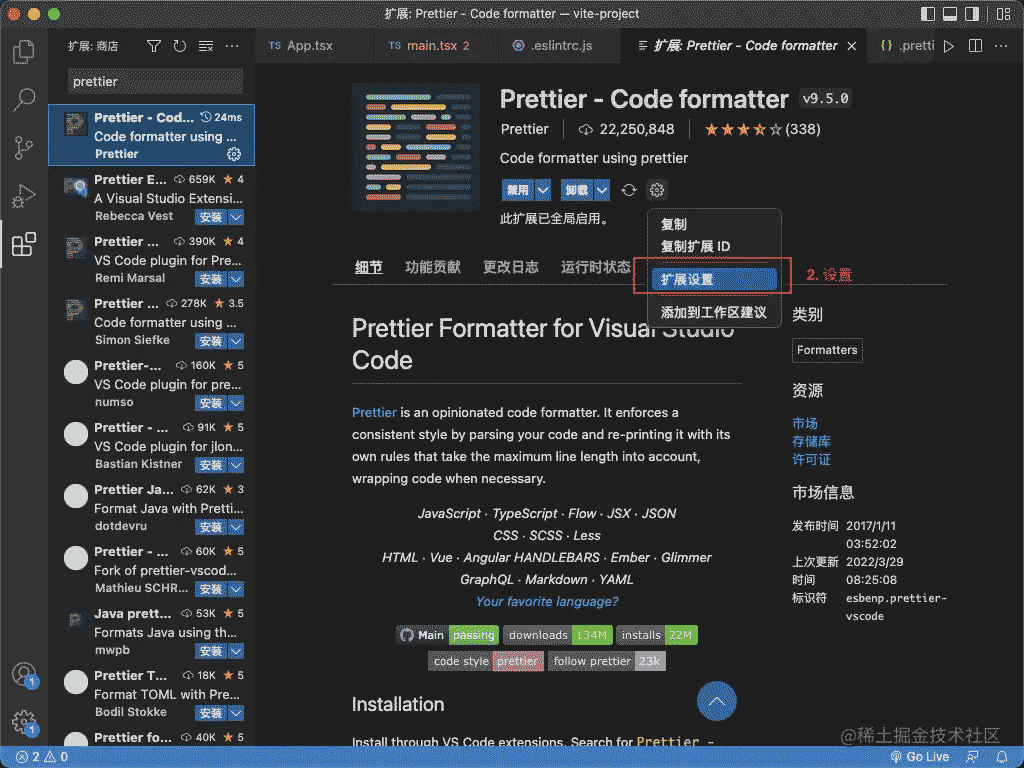
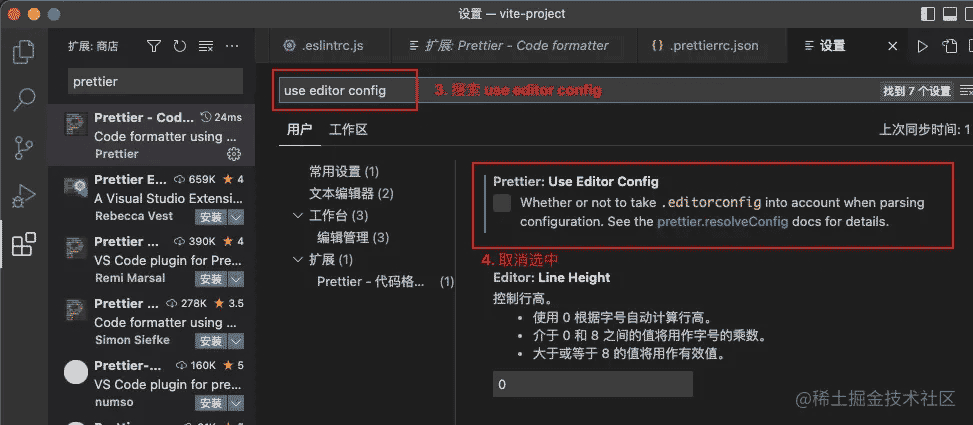
注意⚠️:
修改.prettierrc.json文件后,需要重启vscode才生效
如果配置后,配置不生效,尝试以下设置:

4. 添加 husky和lint-staged
安装
npm i -D lint-staged husky
配置
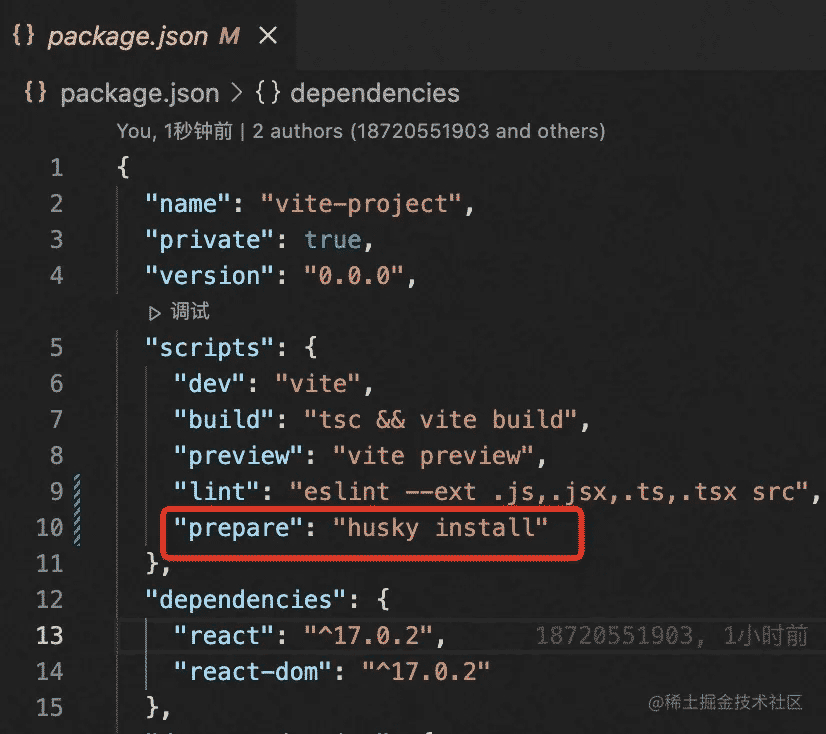
在package.json中添加脚本
npm set-script prepare "husky install"
package.json文件的scripts中,就会自动添加prepare;
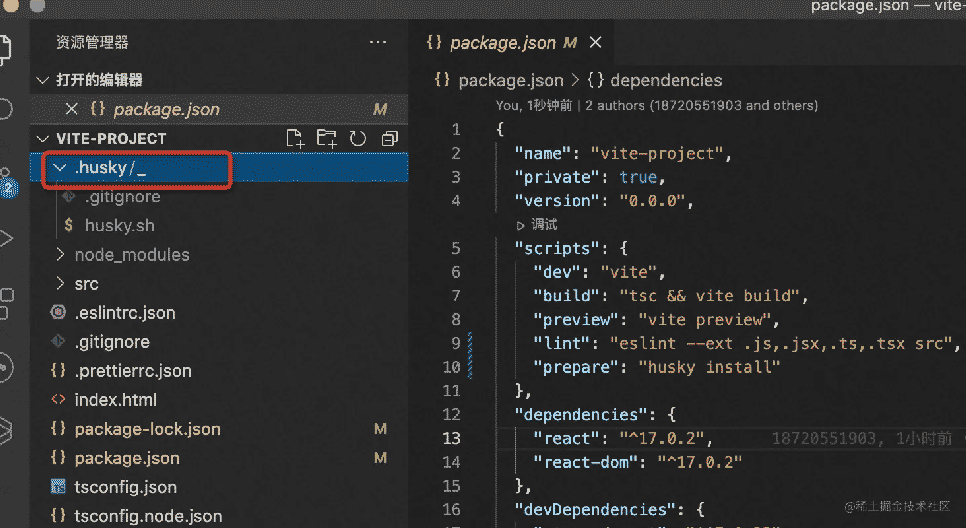
2. 初始化husky,将 git hooks钩子交由husky执行
npm run prepare
会在根目录创建.husky文件夹
3. 配置package.json
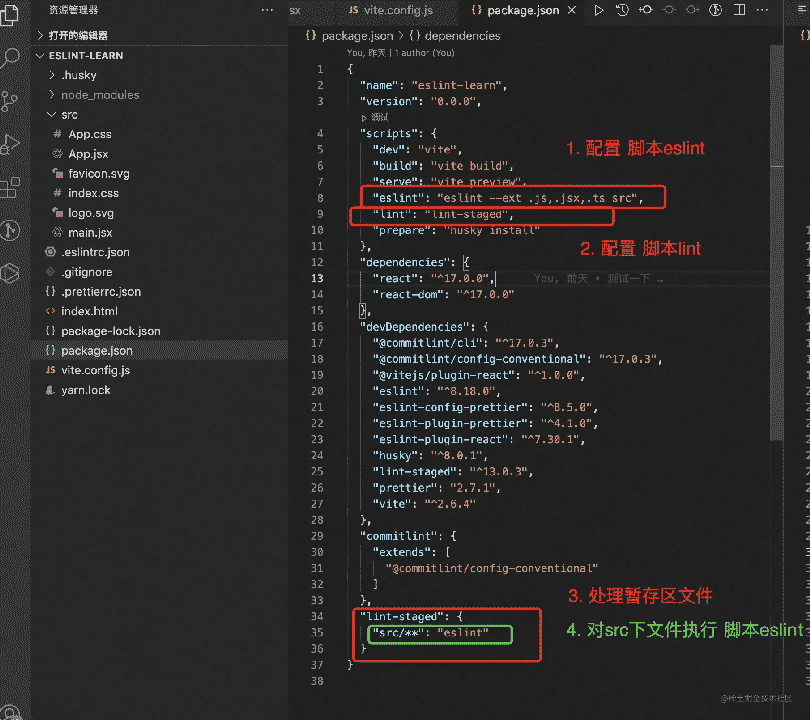
package.json文件如下:
{
  "env": {
    "browser": true,
    "node": true,
    "es2021": true
  },
  "extends": [
    "plugin:react/recommended",
    "airbnb",
    "plugin:prettier/recommended",
    "plugin:import/recommended"
  ],
  "parser": "@typescript-eslint/parser",
  "parserOptions": {
    "ecmaFeatures": {
      "jsx": true
    },
    "ecmaVersion": "latest",
    "sourceType": "module"
  },
  "plugins": ["react", "@typescript-eslint"],
  "rules": {
    "import/no-extraneous-dependencies": [
      "error",
      {"devDependencies": true}
    ],
    "react/jsx-filename-extension": [
      "error",
      {
        "extensions": [".js", ".jsx", ".tsx", ".ts"]
      }
    ],
    "import/no-unresolved": "off",
    "import/extensions": "off",
    "import/no-absolute-path": "off"
  }
}
添加钩子pre-commit
npx husky add .husky/pre-commit "npx lint-staged"
5. 配置commitlint
- 作用:规范提交信息
- 格式:git commit -m '类型: 描述性文字'
| 类型 | 概念 |
|---|---|
| build | 编译相关的修改,例如发布版本、对项目构建或者依赖的改动 |
| ci | 持续集成修改 |
| docs | 文档修改 |
| feat | 新特性、新功能 |
| fix | 修改bug |
| perf | 优化相关,比如提升性能、体验 |
| refactor | 代码重构 |
| revert | 回滚到上一个版本 |
| style | 代码格式修改, 注意不是 css 修改 |
| test | 测试用例修改 |
| chore | 其他修改,比如改变构建流程、或者增加依赖库、工具等 |
- 安装
npm i -D commitlint @commitlint/config-conventional
- 配置
package.json中配置commitlint
{
    // ...
    "commitlint": {
        "extends": [
            "@commitlint/config-conventional"
        ]
    }
}
- 添加钩子
npx husky add .husky/commit-msg 'npx --no-install commitlint --edit "$1"'
git commit 就会触发提交规范的校验啦;
以上就是vite项目添加eslint prettier及husky方法实例的详细内容,更多关于vite项目添加eslint prettier husky的资料请关注Devmax其它相关文章!