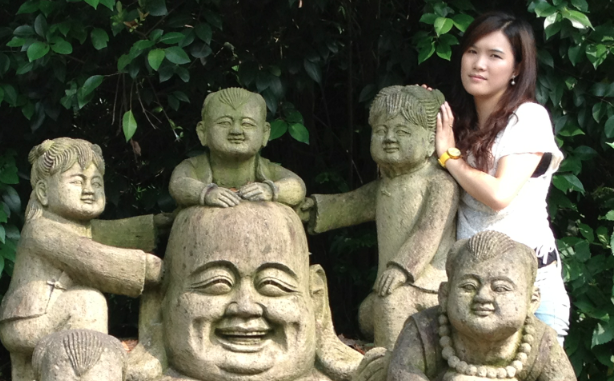
原图:

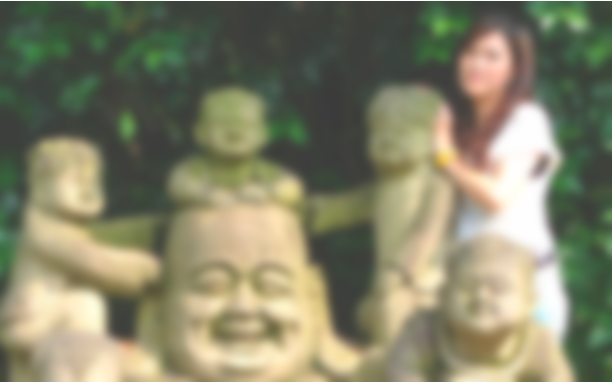
效果图:

实现:
首先需要导入Accelerate.framework。
然后把两个文件加入到自己的项目中即可。
UIImage ImageEffects.h
#import

@interfaceUIImage(ImageEffects)

-(UIImage*)applyLightEffect;

-(UIImage*)applyExtraLightEffect;

-(UIImage*)applyDarkEffect;

-(UIImage*)applyTintEffectWithColor:(UIColor*)tintColor;

-(UIImage*)applyBlurWithRadius:(CGFloat)blurRadius tintColor:(UIColor*)tintColor saturationDeltaFactor:(CGFloat)saturationDeltaFactor maskImage:(UIImage*)maskImage;

@end
UIImage ImageEffects.m
#import "UIImage ImageEffects.h"

#import

#import

@implementationUIImage(ImageEffects)

-(UIImage*)applyLightEffect

{

UIColor*tintColor =[UIColor colorWithWhite:1.0 alpha:0.3];

return[self applyBlurWithRadius:30 tintColor:tintColor saturationDeltaFactor:1.8 maskImage:nil];

}

-(UIImage*)applyExtraLightEffect

{

UIColor*tintColor =[UIColor colorWithWhite:0.97 alpha:0.82];

return[self applyBlurWithRadius:20 tintColor:tintColor saturationDeltaFactor:1.8 maskImage:nil];

}

-(UIImage*)applyDarkEffect

{

UIColor*tintColor =[UIColor colorWithWhite:0.11 alpha:0.73];

return[self applyBlurWithRadius:20 tintColor:tintColor saturationDeltaFactor:1.8 maskImage:nil];

}

-(UIImage*)applyTintEffectWithColor:(UIColor*)tintColor

{

constCGFloatEffectColorAlpha=0.6;

UIColor*effectColor = tintColor;

int componentCount =CGColorGetNumberOfComponents(tintColor.CGColor);

if(componentCount ==2){

CGFloat b;

if([tintColor getWhite:&b alpha:NULL]){

effectColor =[UIColor colorWithWhite:b alpha:EffectColorAlpha];

}

}

else{

CGFloat r, g, b;

if([tintColor getRed:&r green:&g blue:&b alpha:NULL]){

effectColor =[UIColor colorWithRed:r green:g blue:b alpha:EffectColorAlpha];

}

}

return[self applyBlurWithRadius:10 tintColor:effectColor saturationDeltaFactor:-1.0 maskImage:nil];

}

-(UIImage*)applyBlurWithRadius:(CGFloat)blurRadius tintColor:(UIColor*)tintColor saturationDeltaFactor:(CGFloat)saturationDeltaFactor maskImage:(UIImage*)maskImage

{

// Check pre-conditions.

if(self.size.width = 1: %@",self.size.width,self.size.height,self);

returnnil;

}

if(!self.CGImage){

NSLog(@"*** error: image must be backed by a CGImage: %@",self);

returnnil;

}

if(maskImage &&!maskImage.CGImage){

NSLog(@"*** error: maskImage must be backed by a CGImage: %@", maskImage);

returnnil;

}

CGRect imageRect ={CGPointZero,self.size };

UIImage*effectImage =self;

BOOL hasBlur = blurRadius > __FLT_EPSILON__;

BOOL hasSaturationChange = fabs(saturationDeltaFactor -1.)> __FLT_EPSILON__;

if(hasBlur || hasSaturationChange){

UIGraphicsBeginImageContextWithOptions(self.size, NO,[[UIScreen mainScreen] scale]);

CGContextRef effectInContext =UIGraphicsGetCurrentContext();

CGContextScaleCTM(effectInContext,1.0,-1.0);

CGContextTranslateCTM(effectInContext,0,-self.size.height);

CGContextDrawImage(effectInContext, imageRect,self.CGImage);

vImage_Buffer effectInBuffer;

effectInBuffer.data =CGBitmapContextGetData(effectInContext);

effectInBuffer.width =CGBitmapContextGetWidth(effectInContext);

effectInBuffer.height =CGBitmapContextGetHeight(effectInContext);

effectInBuffer.rowBytes =CGBitmapContextGetBytesPerRow(effectInContext);

UIGraphicsBeginImageContextWithOptions(self.size, NO,[[UIScreen mainScreen] scale]);

CGContextRef effectOutContext =UIGraphicsGetCurrentContext();

vImage_Buffer effectOutBuffer;

effectOutBuffer.data =CGBitmapContextGetData(effectOutContext);

effectOutBuffer.width =CGBitmapContextGetWidth(effectOutContext);

effectOutBuffer.height =CGBitmapContextGetHeight(effectOutContext);

effectOutBuffer.rowBytes =CGBitmapContextGetBytesPerRow(effectOutContext);

if(hasBlur){

// A description of how to compute the box kernel width from the Gaussian

// radius (aka standard deviation) appears in the SVG spec:

// http://www.w3.org/TR/SVG/filters.html#feGaussianBlurElement

//

// For larger values of 's' (s >= 2.0), an approximation can be used: Three

// successive box-blurs build a piece-wise quadratic convolution kernel, which

// approximates the Gaussian kernel to within roughly 3%.

//

// let d = floor(s * 3*sqrt(2*pi)/4   0.5)

//

// ... if d is odd, use three box-blurs of size 'd', centered on the output pixel.

//

CGFloat inputRadius = blurRadius *[[UIScreen mainScreen] scale];

NSUInteger radius = floor(inputRadius *3.* sqrt(2* M_PI)/4 0.5);

if(radius %2!=1){

radius  =1;// force radius to be odd so that the three box-blur methodology works.

}

vImageBoxConvolve_ARGB8888(&effectInBuffer,&effectOutBuffer, NULL,0,0, radius, radius,0, kvImageEdgeExtend);

vImageBoxConvolve_ARGB8888(&effectOutBuffer,&effectInBuffer, NULL,0,0, radius, radius,0, kvImageEdgeExtend);

vImageBoxConvolve_ARGB8888(&effectInBuffer,&effectOutBuffer, NULL,0,0, radius, radius,0, kvImageEdgeExtend);

}

BOOL effectImageBuffersAreSwapped = NO;

if(hasSaturationChange){

CGFloat s = saturationDeltaFactor;

CGFloat floatingPointSaturationMatrix[]={

0.0722 0.9278* s,0.0722-0.0722* s,0.0722-0.0722* s,0,

0.7152-0.7152* s,0.7152 0.2848* s,0.7152-0.7152* s,0,

0.2126-0.2126* s,0.2126-0.2126* s,0.2126 0.7873* s,0,

0,0,0,1,

};

constint32_t divisor =256;

NSUInteger matrixSize =sizeof(floatingPointSaturationMatrix)/sizeof(floatingPointSaturationMatrix[0]);

int16_t saturationMatrix[matrixSize];

for(NSUInteger i =0; i
调用:
UIImageView*me =[[UIImageView alloc] initWithFrame:CGRectMake(10,480,614,381)];

[me setImage:[[UIImage imageNamed:@"me.png"] applyBlurWithRadius:5 tintColor:[UIColor colorWithWhite:1 alpha:0.2] saturationDeltaFactor:1.8 maskImage:nil]];

[self.view addSubview:me];
ok!So easy!