前言
你好! 本文章主要介绍如何用Android Studio制作简易的门户界面,主要说明框架的各部分功能与实现过程,结尾处附有源码。
界面分析
注:按钮图标是从阿里矢量图标库获取,保存在drawable文件中调用。

首先根据我们的大致规划布局,我们可以先建立三个核心XML文件:
top.xml:
<?xml version="1.0" encoding="utf-8"?>
<LinearLayout xmlns:android="http://schemas.android.com/apk/res/android"
    android:layout_width="match_parent"
    android:layout_height="match_parent">

    <LinearLayout
        android:layout_width="match_parent"
        android:layout_height="match_parent"
        android:orientation="vertical">

        <TextView
            android:id="@ id/textView2"
            android:layout_width="match_parent"
            android:layout_height="60dp"
            android:background="#070707"
            android:gravity="center"
            android:text="奶茶小样"
            android:textAppearance="@style/TextAppearance.AppCompat.Body2"
            android:textColor="#F8F5F5"
            android:textSize="26sp"
            android:textStyle="bold"
            android:typeface="monospace" />
    </LinearLayout>
</LinearLayout>
bottom.xml:
<?xml version="1.0" encoding="utf-8"?>
<LinearLayout xmlns:android="http://schemas.android.com/apk/res/android"
    xmlns:app="http://schemas.android.com/apk/res-auto"
    xmlns:tools="http://schemas.android.com/tools"
    android:layout_width="match_parent"
    android:layout_height="100dp"
    android:background="#0B0B0B"
    android:baselineAligned="false"
    android:gravity="center|center_horizontal">

    <LinearLayout
        android:id="@ id/bottom_zhenzhu_bar"
        android:layout_width="wrap_content"
        android:layout_height="wrap_content"
        android:layout_weight="1"
        android:gravity="center|center_horizontal"
        android:orientation="vertical">

        <ImageButton
            android:id="@ id/bottom_zhenzhu_image"
            android:layout_width="wrap_content"
            android:layout_height="wrap_content"
            android:background="@color/black"
            android:clickable="false"
            android:contentDescription="@string/app_name"
            android:src="@drawable/zhenzhu" />
        <!--            tools:srcCompat="@drawable/Zhengzhou" />-->

        <TextView
            android:id="@ id/bottom_zhenzhu_text"
            android:layout_width="wrap_content"
            android:layout_height="match_parent"
            android:layout_weight="1"
            android:text="珍珠"
            android:textColor="#FBFBFB"
            android:textSize="24sp" />
    </LinearLayout>

    <LinearLayout
        android:id="@ id/bottom_chadong_bar"
        android:layout_width="wrap_content"
        android:layout_height="wrap_content"
        android:layout_weight="1"
        android:gravity="center"
        android:orientation="vertical">

        <ImageButton
            android:id="@ id/bottom_chadong_image"
            android:layout_width="wrap_content"
            android:layout_height="wrap_content"
            android:background="@color/black"
            android:clickable="false"
            android:contentDescription="@string/app_name"
            android:src="@drawable/milktea1"
            tools:srcCompat="@drawable/milktea1" />

        <TextView
            android:id="@ id/bottom_chadong_text"
            android:layout_width="wrap_content"
            android:layout_height="match_parent"
            android:layout_weight="1"
            android:text="茶冻"
            android:textColor="#FBFAFA"
            android:textSize="24sp" />
    </LinearLayout>

    <LinearLayout
        android:id="@ id/bottom_naigai_bar"
        android:layout_width="wrap_content"
        android:layout_height="wrap_content"
        android:layout_weight="1"
        android:gravity="center"
        android:orientation="vertical">

        <ImageButton
            android:id="@ id/bottom_naigai_image"
            android:layout_width="wrap_content"
            android:layout_height="wrap_content"
            android:background="@color/black"
            android:clickable="false"
            android:contentDescription="@string/app_name"
            android:src="@drawable/milktea2"
            tools:srcCompat="@drawable/milktea2" />

        <TextView
            android:id="@ id/bottom_naigai_text"
            android:layout_width="wrap_content"
            android:layout_height="match_parent"
            android:layout_weight="1"
            android:gravity="center"
            android:text="奶盖"
            android:textColor="#FBF8F8"
            android:textSize="24sp" />
    </LinearLayout>

    <LinearLayout
        android:id="@ id/bottom_buding_bar"
        android:layout_width="wrap_content"
        android:layout_height="wrap_content"
        android:layout_weight="1"
        android:gravity="center"
        android:orientation="vertical">

        <ImageButton
            android:id="@ id/bottom_buding_image"
            android:layout_width="wrap_content"
            android:layout_height="wrap_content"
            android:background="@color/black"
            android:clickable="false"
            android:contentDescription="@string/app_name"
            android:src="@drawable/milktea3"
            tools:srcCompat="@drawable/milktea3" />

        <TextView
            android:id="@ id/bottom_buding_text"
            android:layout_width="wrap_content"
            android:layout_height="wrap_content"
            android:layout_weight="1"
            android:text="布丁"
            android:textColor="#FAF8F8"
            android:textSize="24sp" />
    </LinearLayout>

</LinearLayout>
lactivity_main.xml:
<?xml version="1.0" encoding="utf-8"?>
<LinearLayout xmlns:android="http://schemas.android.com/apk/res/android"
    xmlns:app="http://schemas.android.com/apk/res-auto"
    xmlns:tools="http://schemas.android.com/tools"
    android:id="@ id/linearLayout"
    android:layout_width="match_parent"
    android:layout_height="match_parent"
    android:clickable="true"
    android:orientation="vertical"
    tools:context=".MainActivity">

    <include
        layout="@layout/top"
        android:layout_width="match_parent"
        android:layout_height="wrap_content" />

    <FrameLayout
        android:id="@ id/id_content"
        android:layout_width="match_parent"
        android:layout_height="match_parent"
        android:layout_weight="1">


    </FrameLayout>

    <include
        layout="@layout/bottom"
        android:layout_width="match_parent"
        android:layout_height="wrap_content" />

</LinearLayout>
注意:在top.xml和bottom.xml文件写好后,将其插入到lactivity_main.xml文件的头尾位置,并在中间加入FrameLayout来设置之后的Fragment文件切换。
界面动态实现代码
目录结构:
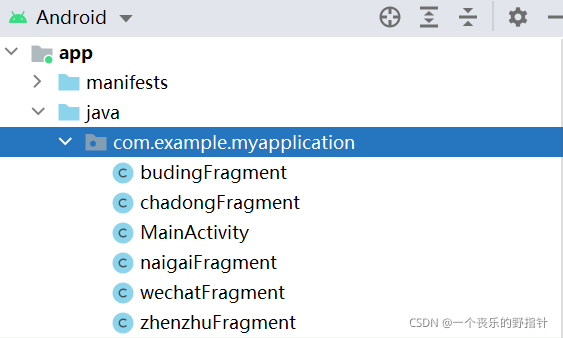
MainActivity:
建立相关变量:
private Fragment zhenzhuFragment=new zhenzhuFragment();
    private Fragment naigaiFragment=new naigaiFragment();
    private Fragment budingFragment=new budingFragment();
    private Fragment chadongFragment=new chadongFragment();

    private FragmentManager fragmentManager;
    private LinearLayout mTzhenzhu,mTchadong,mTnaigai,mTbuding;
    private ImageButton mTmgZhenZhu;
    private ImageButton mTmgChaDong;
    private ImageButton mTmgNaiGai;
    private ImageButton mTmgBuDing;

    private TextView text_zhenzhu;
    private TextView text_chadong;
    private TextView text_naigai;
    private TextView text_buding;
主要函数方法:
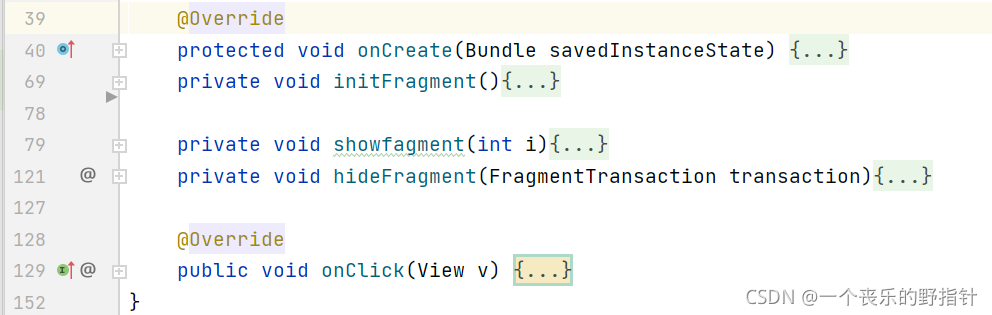
OnCreate: 利用我们在XML文件中定义的View的id属性来获取相应的View对象,并且加上View.OnClickListener接口,使下方生成的OnClick()方法自动匹配相应,同时在此函数中我们有添加了相应的监听器。
initFragment:
我们为了实现界面切换,需定义Fragment文件,因为我们的转换界面有4种,故我们总共需要5个fragment文件。
wechatFragemt:
public class wechatFragment extends Fragment {


    public wechatFragment() {
        // Required empty public constructor
    }
  @Override
    public View onCreateView(LayoutInflater inflater, ViewGroup container,
                             Bundle savedInstanceState) {
        // Inflate the layout for this fragment
        return inflater.inflate(R.layout.fragment_wechat, container, false);
    }
}
其余四个文件大致上与此文件相似,但其中的onCreateView函数应根据我们自己配置的XML文件而有所不同,例如:
budingFragment:
public class budingFragment extends Fragment {
    public budingFragment(){

    }
    @Override
    public View onCreateView( LayoutInflater inflater,  ViewGroup container,  Bundle savedInstanceState) {
//        return super.onCreateView(inflater, container, savedInstanceState);
        return inflater.inflate(R.layout.buding_fragment_wechat,container,false);
    }
}
我们可以看到,此函数的返回值是根据XML文件而作出改变,如果忽视,界面转换将会失败。
initFragment函数主要作用就是向之前的lacitivity_main.xml文件中的Fragment部分添加我们要做切换的代码。
showfagment: 我们在此函数中通过调用索引值来设置相应的界面效果代码,例如Fragment界面展示、图片的改变、字体的设置。(由于我选择的按钮图片颜色过于鲜艳,故无法实现点击时的亮暗转换,为了体现按钮被点击,我设置了当点击按钮时字体颜色会发生变化作为替代)
hideFragment:顾名思义,此函数是为了隐藏Fragment,配合showFragment函数只显示我们目前需要显示的Fragment。
onClick:前面在介绍OnCreate函数时说过,是由View.OnClickListener接口生成,设置我们的点击过程,并且此函数调用showFragment,完全控制我们制作的界面转换流程。
静态界面实现
目录结构:
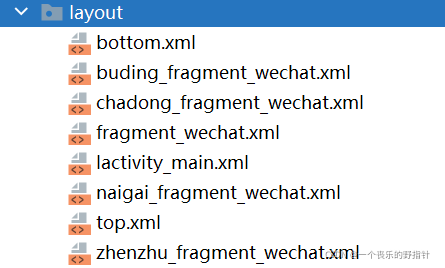
三个核心文件在前面已经介绍过,在此不做过多解释,如果不清楚可翻到上面去查看。根据上述创建5个Fragment文件,我们应对应生成5个Fragment的XML文件来设计界面效果。
fragment_wechat:
此文件是由上述的的Fragment的java文件自动生成,故其余四个文件可参考该文件进行配置。
<?xml version="1.0" encoding="utf-8"?>
<LinearLayout xmlns:android="http://schemas.android.com/apk/res/android"
    xmlns:tools="http://schemas.android.com/tools"
    android:layout_width="match_parent"
    android:layout_height="match_parent"
    android:gravity="center"
    android:orientation="vertical"
    tools:context=".wechatFragment">

    <!-- TODO: Update blank fragment layout -->
    <TextView
        android:id="@ id/textView"
        android:layout_width="match_parent"
        android:layout_height="match_parent"
        android:gravity="center"
        android:text="这是微信聊天界面"
        android:textSize="48sp" />

</LinearLayout>
在此提醒,像我前面写的Fragment的java文件因与对应的XML文件联系起来,我们的XML文件也应与Fragment的java文件联系起来。
以buding_fragment_wechat为例:
<?xml version="1.0" encoding="utf-8"?>
<LinearLayout xmlns:android="http://schemas.android.com/apk/res/android"
    xmlns:tools="http://schemas.android.com/tools"
    android:layout_width="match_parent"
    android:layout_height="match_parent"
    android:orientation="vertical"
    tools:context=".budingFragment">
<!--    tools:context=".wechatFragment"-->


    <!-- TODO: Update blank fragment layout -->
    <TextView
        android:id="@ id/textView2"
        android:layout_width="match_parent"
        android:layout_height="match_parent"
        android:layout_weight="1"
        android:gravity="center"
        android:text="这是布丁界面"
        android:textSize="48sp" />

</LinearLayout>
调用context属性与其JAVA文件联系。
总结
本文介绍了AndriodStudio制作门户界面的大致流程以及界面切换的功能,如有错误,敬请指正。
代码仓库:github
码云链接:https://github.com/Haru-Malfoy/work1.git
到此这篇关于Android Studio实现仿微信APP门户界面详解及源码的文章就介绍到这了,更多相关Android 微信界面内容请搜索Devmax以前的文章或继续浏览下面的相关文章希望大家以后多多支持Devmax!