数据驱动
数据的改变从而驱动自动化测试用例的执行,最终引起测试结果的改变。简单说就是参数化的应用。
测试驱动在自动化测试中的应用场景:
- 测试步骤的数据驱动;
- 测试数据的数据驱动;
- 配置的数据驱动;
1、pytest结合数据驱动-yaml
实现读yaml文件,先创建env.yml文件配置测试数据
工程目录结构:
- data目录:存放yaml文件
-
  dev: 127.0.0.1
  #dev: 127.0.0.2
  #prod: 127.0.0.3
- testcase目录:存放测试用例文件
import pytest
import yaml
class TestYaml:
    @pytest.mark.parametrize("env", yaml.safe_load(open("./env.yml")))
    def test_yaml(self, env):
        if "test" in env:
            print("这是测试环境")
            # print(env)
            print("测试环境的ip是:", env["test"])
        elif "dev" in env:
            print("这是开发文件")
            print("开发环境的ip是:", env["dev"])
            # print(env)
结果示例:

2、pytest结合数据驱动-excel
常用的读取方式有:xlrd、xlwings、pandas、openpyxl
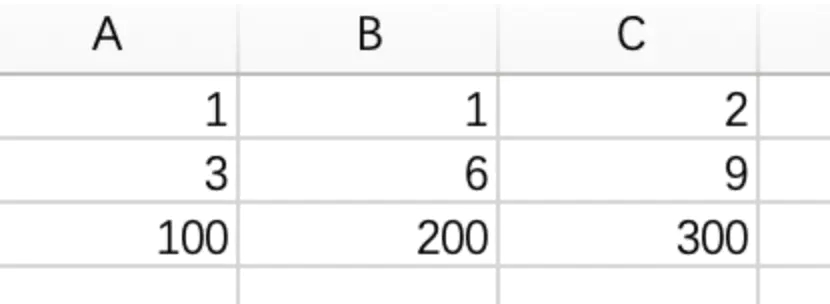
以读excel文件,实现A B=C并断言为例~
工程目录结构:
data目录:存放excel数据文件
- func目录:存放被测函数文件
def my_add(x, y):
    result = x   y
    return result
- testcase目录:存放测试用例文件
import openpyxl
import pytest
from test_pytest.read_excel.func.operation import my_add
def test_get_excel():
    """
    解析excel数据
    :return: [[1,1,2],[3,6,9],[100,200,300]]
    """
    book = openpyxl.load_workbook('../data/param.xlsx')
    sheet = book.active
    cells = sheet["A1":"C3"]
    print(cells)
    values = []
    for row in sheet:
        data = []
        for cell in row:
            data.append(cell.value)
        values.append(data)
    print(values)
    return values
class TestWithExcel:
    @pytest.mark.parametrize('x,y,expected', test_get_excel())
    def test_add(self, x, y, expected):
        assert my_add(int(x), int(y)) == int(expected)
3、pyetst结合数据驱动-csv
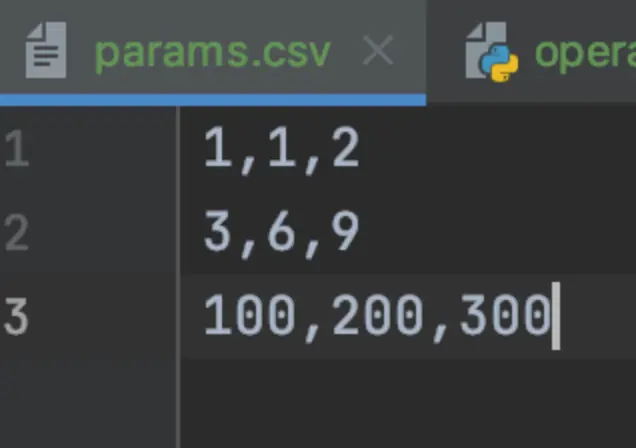
csv:逗号文件,以逗号分隔的string文件
读取csv数据:
- 内置函数open()
- 内置模块csv
- 方法:csv.reader(iterable)
- 参数:iterable,文件或列表对象
- 返回:迭代器,遍历迭代器,每次会返回一行数据
以读csv文件,实现A B=C并断言为例~
工程目录结构:
data目录:存放csv数据文件
- func目录:存放被测函数文件
def my_add(x, y):
    result = x   y
    return result
- testcase目录:存放测试用例文件
import csv
import pytest
from test_pytest.read_csv.func.operation import my_add
def test_get_csv():
    """
    解析csv文件
    :return:
    """
    with open('../data/params.csv') as file:
        raw = csv.reader(file)
        data = []
        for line in raw:
            data.append(line)
    print(data)
    return data
class TestWithCsv:
    @pytest.mark.parametrize('x,y,expected', test_get_csv())
    def test_add(self, x, y, expected):
        assert my_add(int(x), int(y)) == int(expected)
4、pytest结合数据驱动-json
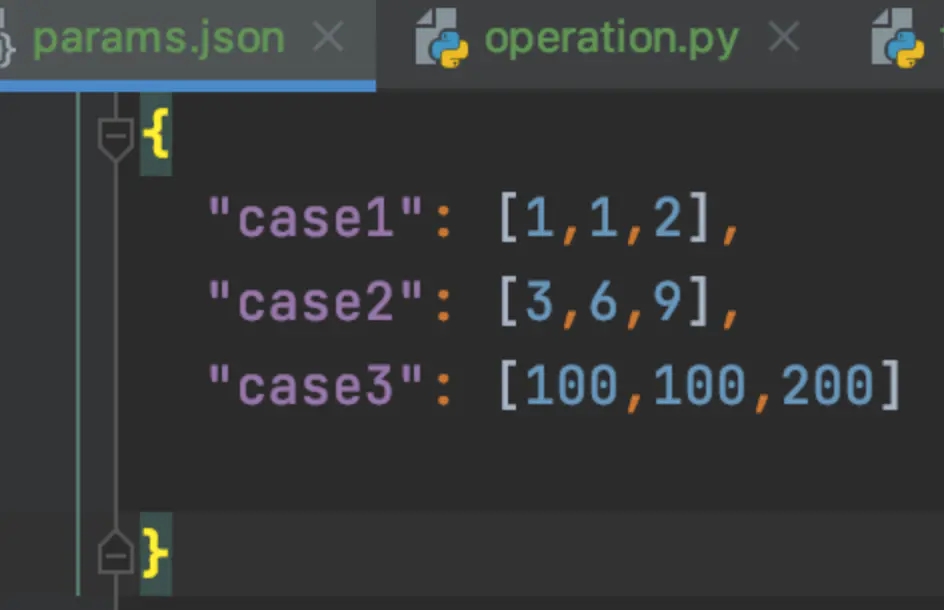
json:js对象,是一种轻量级的数据交换格式。
json结构:
- 对象{"key":value}
- 数组[value1,value2...]
查看json文件:
- 1.pycharm
- 2.txt记事本
读取json文件:
- 内置函数open()
- 内置库json
- 方法 json.loads() json.dumps()
以读json文件,实现A B=C并断言为例~
工程目录结构:
data目录:存放json数据文件
- func目录:存放被测函数文件
def my_add(x, y):
    result = x   y
    return result
- testcase目录:存放测试用例文件
import json
import pytest
from test_pytest.read_json.func.operation import my_add
def test_get_json():
    """
    解析json数据
    :return: [[1,1,2],[3,6,9],[100,200,300]]
    """
    with open('../data/params.json', 'r') as file:
        data = json.loads(file.read())
        print(list(data.values()))
        return list(data.values())
class TestWithJson:
    @pytest.mark.parametrize('x,y,expected', test_get_json())
    def test_add(self, x, y, expected):
        assert my_add(int(x), int(y)) == int(expected)
以上就是pytest自动化测试数据驱动yaml/excel/csv/json的详细内容,更多关于pytest测试数据驱动yaml/excel/csv/json的资料请关注Devmax其它相关文章!