环境准备
创建 Maven 项目创建服务器远程连接
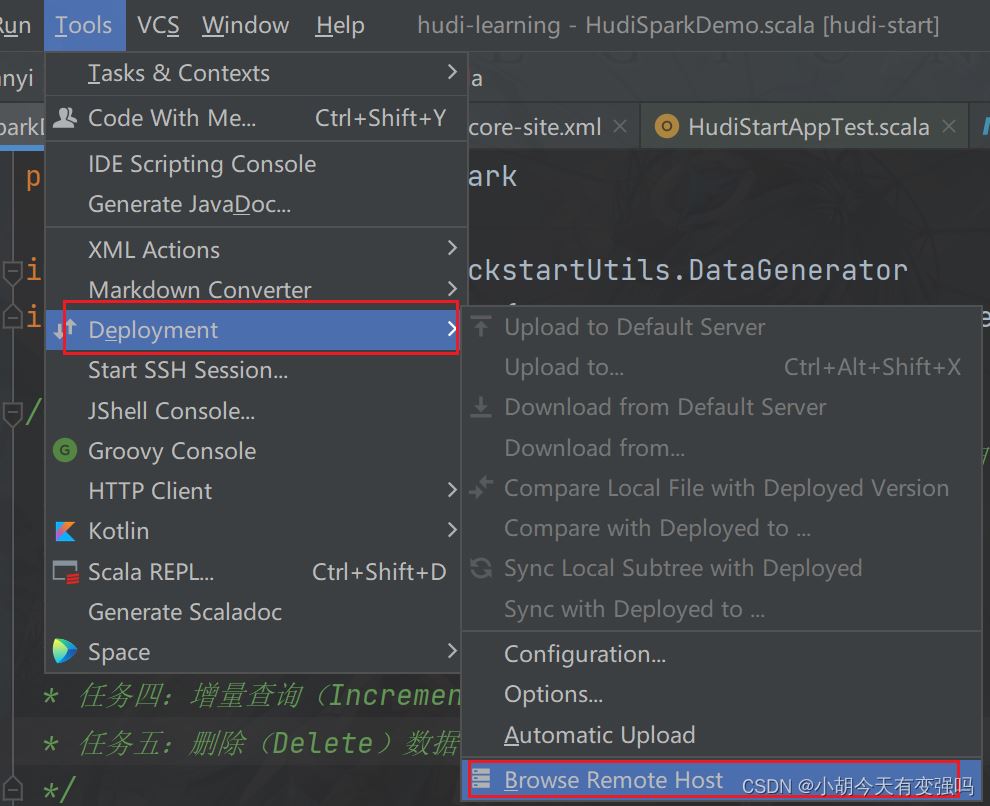
Tools------Delployment-----Browse Remote Host
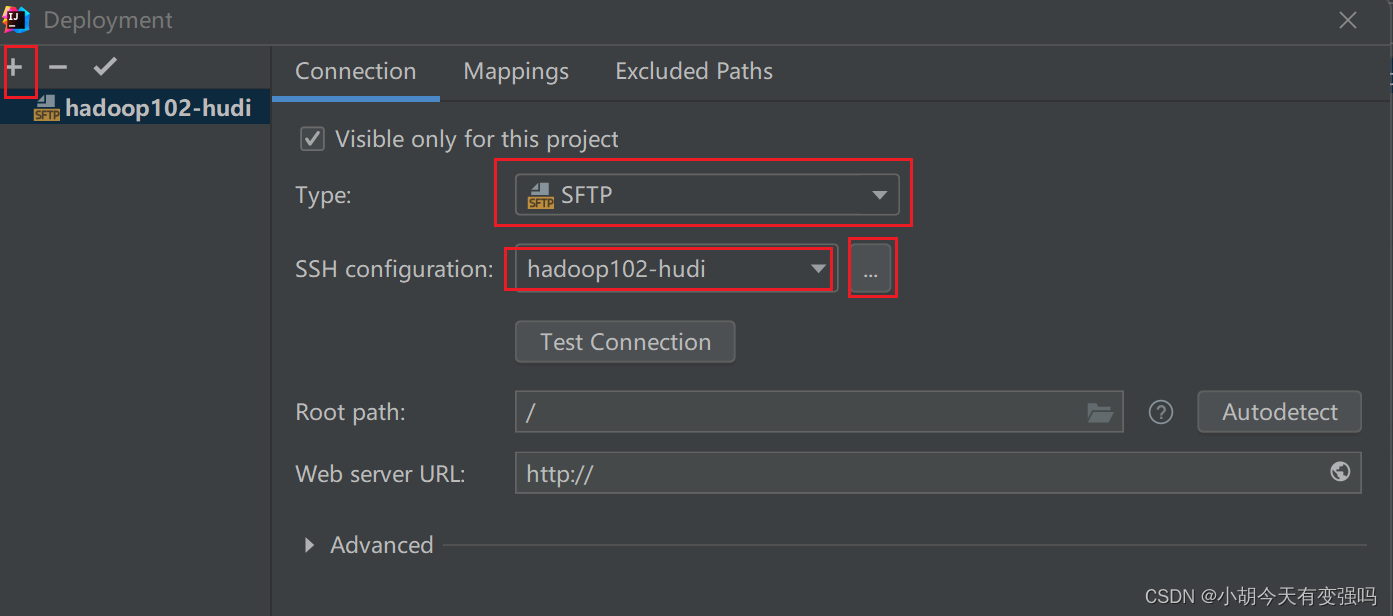
设置如下内容:
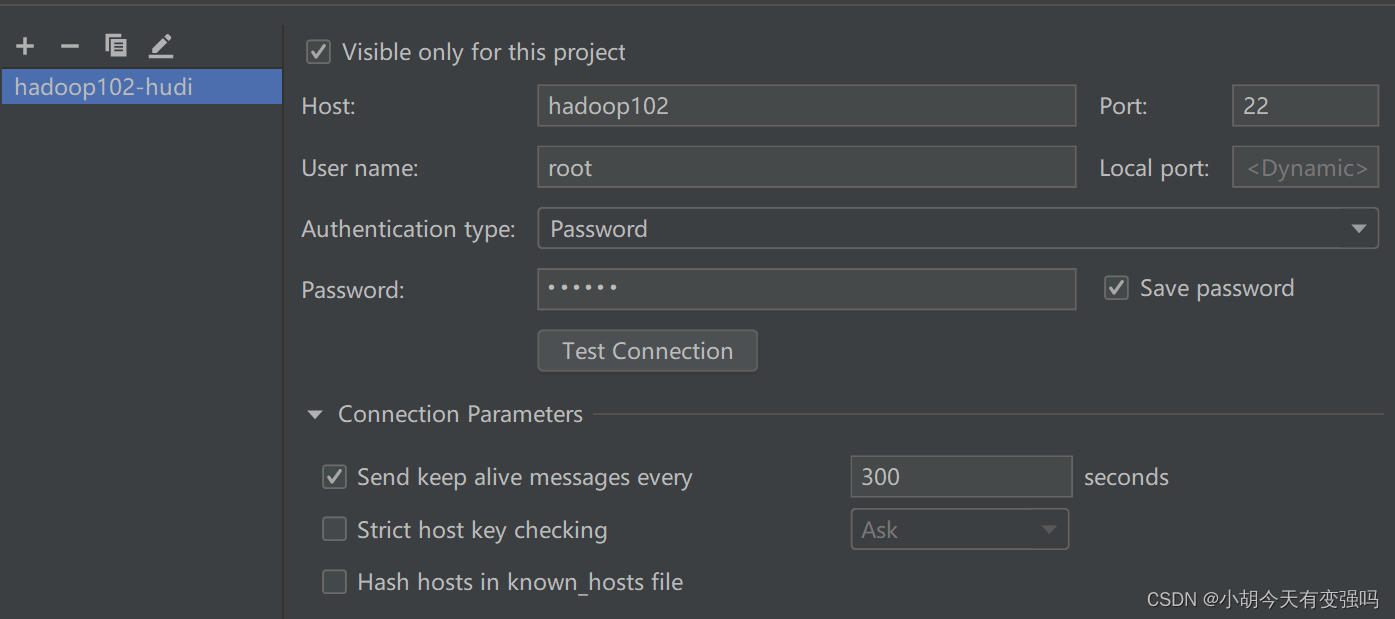
在这里输入服务器的账号和密码
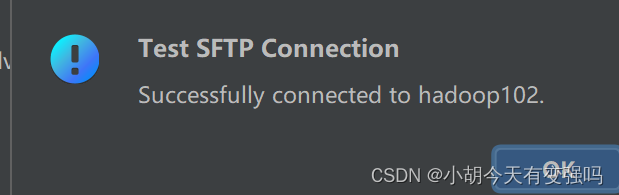
点击Test Connection,提示Successfully的话,就说明配置成功。
复制Hadoop的 core-site.xml、hdfs-site.xml 以及 log4j.properties 三个文件复制到resources文件夹下。
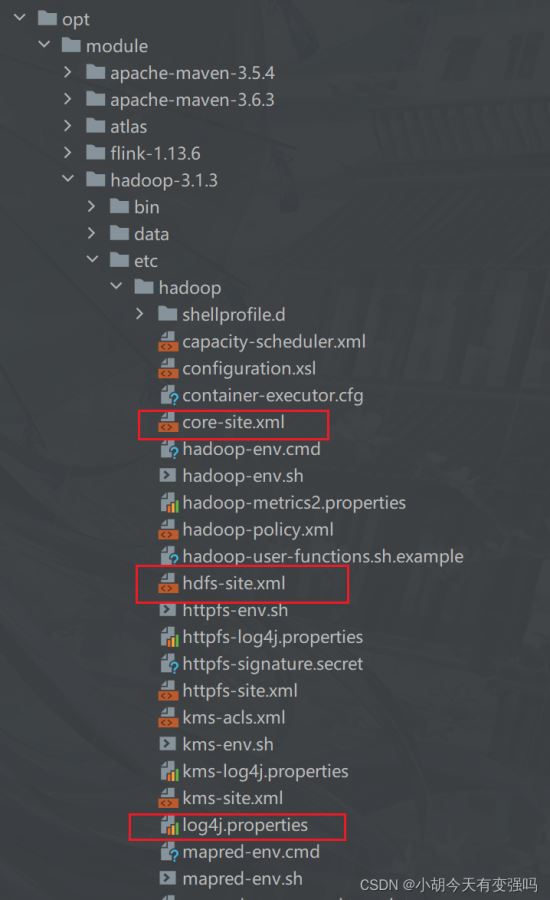
设置 log4j.properties 为打印警告异常信息:
log4j.rootCategory=WARN, console
4.添加 pom.xml 文件
<repositories>
        <repository>
            <id>aliyun</id>
            <url>http://maven.aliyun.com/nexus/content/groups/public/</url>
        </repository>
        <repository>
            <id>cloudera</id>
            <url>https://repository.cloudera.com/artifactory/cloudera-repos/</url>
        </repository>
        <repository>
            <id>jboss</id>
            <url>http://repository.jboss.com/nexus/content/groups/public</url>
        </repository>
    </repositories>

    <properties>
        <scala.version>2.12.10</scala.version>
        <scala.binary.version>2.12</scala.binary.version>
        <spark.version>3.0.0</spark.version>
        <hadoop.version>2.7.3</hadoop.version>
        <hudi.version>0.9.0</hudi.version>
    </properties>

    <dependencies>
        <!-- 依赖Scala语言 -->
        <dependency>
            <groupId>org.scala-lang</groupId>
            <artifactId>scala-library</artifactId>
            <version>${scala.version}</version>
        </dependency>
        <!-- Spark Core 依赖 -->
        <dependency>
            <groupId>org.apache.spark</groupId>
            <artifactId>spark-core_${scala.binary.version}</artifactId>
            <version>${spark.version}</version>
        </dependency>
        <!-- Spark SQL 依赖 -->
        <dependency>
            <groupId>org.apache.spark</groupId>
            <artifactId>spark-sql_${scala.binary.version}</artifactId>
            <version>${spark.version}</version>
        </dependency>

        <!-- Hadoop Client 依赖 -->
        <dependency>
            <groupId>org.apache.hadoop</groupId>
            <artifactId>hadoop-client</artifactId>
            <version>${hadoop.version}</version>
        </dependency>

        <!-- hudi-spark3 -->
        <dependency>
            <groupId>org.apache.hudi</groupId>
            <artifactId>hudi-spark3-bundle_2.12</artifactId>
            <version>${hudi.version}</version>
        </dependency>
        <dependency>
            <groupId>org.apache.spark</groupId>
            <artifactId>spark-avro_2.12</artifactId>
            <version>${spark.version}</version>
        </dependency>

    </dependencies>

    <build>
        <outputDirectory>target/classes</outputDirectory>
        <testOutputDirectory>target/test-classes</testOutputDirectory>
        <resources>
            <resource>
                <directory>${project.basedir}/src/main/resources</directory>
            </resource>
        </resources>
        <!-- Maven 编译的插件 -->
        <plugins>
            <plugin>
                <groupId>org.apache.maven.plugins</groupId>
                <artifactId>maven-compiler-plugin</artifactId>
                <version>3.0</version>
                <configuration>
                    <source>1.8</source>
                    <target>1.8</target>
                    <encoding>UTF-8</encoding>
                </configuration>
            </plugin>
            <plugin>
                <groupId>net.alchim31.maven</groupId>
                <artifactId>scala-maven-plugin</artifactId>
                <version>3.2.0</version>
                <executions>
                    <execution>
                        <goals>
                            <goal>compile</goal>
                            <goal>testCompile</goal>
                        </goals>
                    </execution>
                </executions>
            </plugin>
        </plugins>
    </build>
要注释掉创建项目时的生成的下面的代码,不然依赖一直报错:
<!-- <properties>-->
<!-- <maven.compiler.source>8</maven.compiler.source>-->
<!-- <maven.compiler.target>8</maven.compiler.target>-->
<!-- </properties>-->
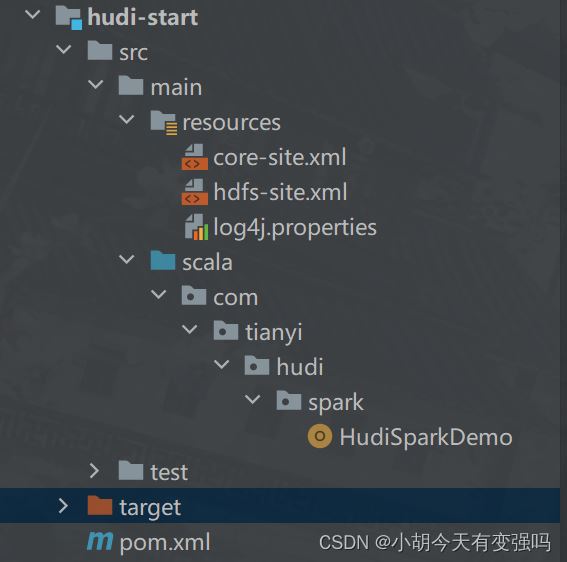
代码结构:
核心代码
import org.apache.hudi.QuickstartUtils.DataGenerator
import org.apache.spark.sql.{DataFrame, SaveMode, SparkSession}
/**
 * Hudi 数据湖的框架,基于Spark计算引擎,对数据进行CURD操作,使用官方模拟赛生成的出租车出行数据
 *
 * 任务一:模拟数据,插入Hudi表,采用COW模式
 * 任务二:快照方式查询(Snapshot Query)数据,采用DSL方式
 * 任务三:更新(Update)数据
 * 任务四:增量查询(Incremental Query)数据,采用SQL方式
 * 任务五:删除(Delete)数据
 */
object HudiSparkDemo {
  /**
   * 官方案例:模拟产生数据,插入Hudi表,表的类型为COW
   */
  def insertData(spark: SparkSession, table: String, path: String): Unit = {
    import spark.implicits._
    // 第1步、模拟乘车数据
    import org.apache.hudi.QuickstartUtils._
    val dataGen: DataGenerator = new DataGenerator()
    val inserts = convertToStringList(dataGen.generateInserts(100))
    import scala.collection.JavaConverters._
    val insertDF: DataFrame = spark.read.json(
      spark.sparkContext.parallelize(inserts.asScala, 2).toDS()
    )
//    		insertDF.printSchema()
//    		insertDF.show(10, truncate = false)
    //第二步: 插入数据到Hudi表
    import org.apache.hudi.DataSourceWriteOptions._
    import org.apache.hudi.config.HoodieWriteConfig._
    insertDF.write
      .mode(SaveMode.Append)
      .format("hudi")
      .option("hoodie.insert.shuffle.parallelism", 2)
      .option("hoodie.insert.shuffle.parallelism", 2)
      //Hudi表的属性设置
      .option(PRECOMBINE_FIELD.key(), "ts")
      .option(RECORDKEY_FIELD.key(), "uuid")
      .option(PARTITIONPATH_FIELD.key(), "partitionpath")
      .option(TBL_NAME.key(), table)
      .save(path)
  }
  /**
   *  采用Snapshot Query快照方式查询表的数据
   */
  def queryData(spark: SparkSession, path: String): Unit = {
    import spark.implicits._
    val tripsDF: DataFrame = spark.read.format("hudi").load(path)
//    tripsDF.printSchema()
//    tripsDF.show(10, truncate = false)
    //查询费用大于10,小于50的乘车数据
    tripsDF
      .filter($"fare" >= 20 && $"fare" <=50)
      .select($"driver", $"rider", $"fare", $"begin_lat", $"begin_lon", $"partitionpath", $"_hoodie_commit_time")
      .orderBy($"fare".desc, $"_hoodie_commit_time".desc)
      .show(20, truncate = false)
  }
  def queryDataByTime(spark: SparkSession, path: String):Unit = {
    import org.apache.spark.sql.functions._
    //方式一:指定字符串,按照日期时间过滤获取数据
    val df1 = spark.read
      .format("hudi")
      .option("as.of.instant", "20220610160908")
      .load(path)
      .sort(col("_hoodie_commit_time").desc)
    df1.printSchema()
    df1.show(numRows = 5, truncate = false)
    //方式二:指定字符串,按照日期时间过滤获取数据
    val df2 = spark.read
      .format("hudi")
      .option("as.of.instant", "2022-06-10 16:09:08")
      .load(path)
      .sort(col("_hoodie_commit_time").desc)
    df2.printSchema()
    df2.show(numRows = 5, truncate = false)
  }

  /**
   * 将DataGenerator作为参数传入生成数据
   */
  def insertData(spark: SparkSession, table: String, path: String, dataGen: DataGenerator): Unit = {
    import spark.implicits._
    // 第1步、模拟乘车数据
    import org.apache.hudi.QuickstartUtils._
    val inserts = convertToStringList(dataGen.generateInserts(100))
    import scala.collection.JavaConverters._
    val insertDF: DataFrame = spark.read.json(
      spark.sparkContext.parallelize(inserts.asScala, 2).toDS()
    )
    //    		insertDF.printSchema()
    //    		insertDF.show(10, truncate = false)
    //第二步: 插入数据到Hudi表
    import org.apache.hudi.DataSourceWriteOptions._
    import org.apache.hudi.config.HoodieWriteConfig._
    insertDF.write
      //更换为Overwrite模式
      .mode(SaveMode.Overwrite)
      .format("hudi")
      .option("hoodie.insert.shuffle.parallelism", 2)
      .option("hoodie.insert.shuffle.parallelism", 2)
      //Hudi表的属性设置
      .option(PRECOMBINE_FIELD.key(), "ts")
      .option(RECORDKEY_FIELD.key(), "uuid")
      .option(PARTITIONPATH_FIELD.key(), "partitionpath")
      .option(TBL_NAME.key(), table)
      .save(path)
  }
  /**
   * 模拟产生Hudi表中更新数据,将其更新到Hudi表中
   */
  def updateData(spark: SparkSession, table: String, path: String, dataGen: DataGenerator):Unit = {
    import spark.implicits._
    // 第1步、模拟乘车数据
    import org.apache.hudi.QuickstartUtils._
    //产生更新的数据
    val updates = convertToStringList(dataGen.generateUpdates(100))
    import scala.collection.JavaConverters._
    val updateDF: DataFrame = spark.read.json(
      spark.sparkContext.parallelize(updates.asScala, 2).toDS()
    )
    // TOOD: 第2步、插入数据到Hudi表
    import org.apache.hudi.DataSourceWriteOptions._
    import org.apache.hudi.config.HoodieWriteConfig._
    updateDF.write
      //追加模式
      .mode(SaveMode.Append)
      .format("hudi")
      .option("hoodie.insert.shuffle.parallelism", "2")
      .option("hoodie.upsert.shuffle.parallelism", "2")
      // Hudi 表的属性值设置
      .option(PRECOMBINE_FIELD.key(), "ts")
      .option(RECORDKEY_FIELD.key(), "uuid")
      .option(PARTITIONPATH_FIELD.key(), "partitionpath")
      .option(TBL_NAME.key(), table)
      .save(path)
  }
  /**
   *  采用Incremental Query增量方式查询数据,需要指定时间戳
   */
  def incrementalQueryData(spark: SparkSession, path: String): Unit = {
    import spark.implicits._
    // 第1步、加载Hudi表数据,获取commit time时间,作为增量查询数据阈值
    import org.apache.hudi.DataSourceReadOptions._
    spark.read
      .format("hudi")
      .load(path)
      .createOrReplaceTempView("view_temp_hudi_trips")
    val commits: Array[String] = spark
      .sql(
        """
				  |select
				  |  distinct(_hoodie_commit_time) as commitTime
				  |from
				  |  view_temp_hudi_trips
				  |order by
				  |  commitTime DESC
				  |""".stripMargin
      )
      .map(row => row.getString(0))
      .take(50)
    val beginTime = commits(commits.length - 1) // commit time we are interested in
    println(s"beginTime = ${beginTime}")
    // 第2步、设置Hudi数据CommitTime时间阈值,进行增量数据查询
    val tripsIncrementalDF = spark.read
      .format("hudi")
      // 设置查询数据模式为:incremental,增量读取
      .option(QUERY_TYPE.key(), QUERY_TYPE_INCREMENTAL_OPT_VAL)
      // 设置增量读取数据时开始时间
      .option(BEGIN_INSTANTTIME.key(), beginTime)
      .load(path)
    // 第3步、将增量查询数据注册为临时视图,查询费用大于20数据
    tripsIncrementalDF.createOrReplaceTempView("hudi_trips_incremental")
    spark
      .sql(
        """
				  |select
				  |  `_hoodie_commit_time`, fare, begin_lon, begin_lat, ts
				  |from
				  |  hudi_trips_incremental
				  |where
				  |  fare > 20.0
				  |""".stripMargin
      )
      .show(10, truncate = false)
  }
  /**
   * 删除Hudi表数据,依据主键uuid进行删除,如果是分区表,指定分区路径
   */
  def deleteData(spark: SparkSession, table: String, path: String): Unit = {
    import spark.implicits._
    // 第1步、加载Hudi表数据,获取条目数
    val tripsDF: DataFrame = spark.read.format("hudi").load(path)
    println(s"Raw Count = ${tripsDF.count()}")
    // 第2步、模拟要删除的数据,从Hudi中加载数据,获取几条数据,转换为要删除数据集合
    val dataframe = tripsDF.limit(2).select($"uuid", $"partitionpath")
    import org.apache.hudi.QuickstartUtils._
    val dataGenerator = new DataGenerator()
    val deletes = dataGenerator.generateDeletes(dataframe.collectAsList())
    import scala.collection.JavaConverters._
    val deleteDF = spark.read.json(spark.sparkContext.parallelize(deletes.asScala, 2))
    // 第3步、保存数据到Hudi表中,设置操作类型:DELETE
    import org.apache.hudi.DataSourceWriteOptions._
    import org.apache.hudi.config.HoodieWriteConfig._
    deleteDF.write
      .mode(SaveMode.Append)
      .format("hudi")
      .option("hoodie.insert.shuffle.parallelism", "2")
      .option("hoodie.upsert.shuffle.parallelism", "2")
      // 设置数据操作类型为delete,默认值为upsert
      .option(OPERATION.key(), "delete")
      .option(PRECOMBINE_FIELD.key(), "ts")
      .option(RECORDKEY_FIELD.key(), "uuid")
      .option(PARTITIONPATH_FIELD.key(), "partitionpath")
      .option(TBL_NAME.key(), table)
      .save(path)
    // 第4步、再次加载Hudi表数据,统计条目数,查看是否减少2条数据
    val hudiDF: DataFrame = spark.read.format("hudi").load(path)
    println(s"Delete After Count = ${hudiDF.count()}")
  }
  def main(args: Array[String]): Unit = {
    System.setProperty("HADOOP_USER_NAME","hty")
    //创建SparkSession示例对象,设置属性
    val spark: SparkSession = {
      SparkSession.builder()
        .appName(this.getClass.getSimpleName.stripSuffix("$"))
        .master("local[2]")
        // 设置序列化方式:Kryo
        .config("spark.serializer", "org.apache.spark.serializer.KryoSerializer")
        .getOrCreate()
    }
    //定义变量:表名称、保存路径
    val tableName: String = "tbl_trips_cow"
    val tablePath: String = "/hudi_warehouse/tbl_trips_cow"
    //构建数据生成器,模拟产生业务数据
    import org.apache.hudi.QuickstartUtils._
    //任务一:模拟数据,插入Hudi表,采用COW模式
    //insertData(spark, tableName, tablePath)
     //任务二:快照方式查询(Snapshot Query)数据,采用DSL方式
      //queryData(spark, tablePath)
    //queryDataByTime(spark, tablePath)
    // 任务三:更新(Update)数据,第1步、模拟产生数据,第2步、模拟产生数据,针对第1步数据字段值更新,
    // 第3步、将数据更新到Hudi表中
    val dataGen: DataGenerator = new DataGenerator()
    //insertData(spark, tableName, tablePath, dataGen)
    //updateData(spark, tableName, tablePath, dataGen)
    //任务四:增量查询(Incremental Query)数据,采用SQL方式
    //incrementalQueryData(spark, tablePath)
    //任务五:删除(Delete)数据
    deleteData(spark, tableName,tablePath)
    //应用结束,关闭资源
    spark.stop()
  }
}
测试
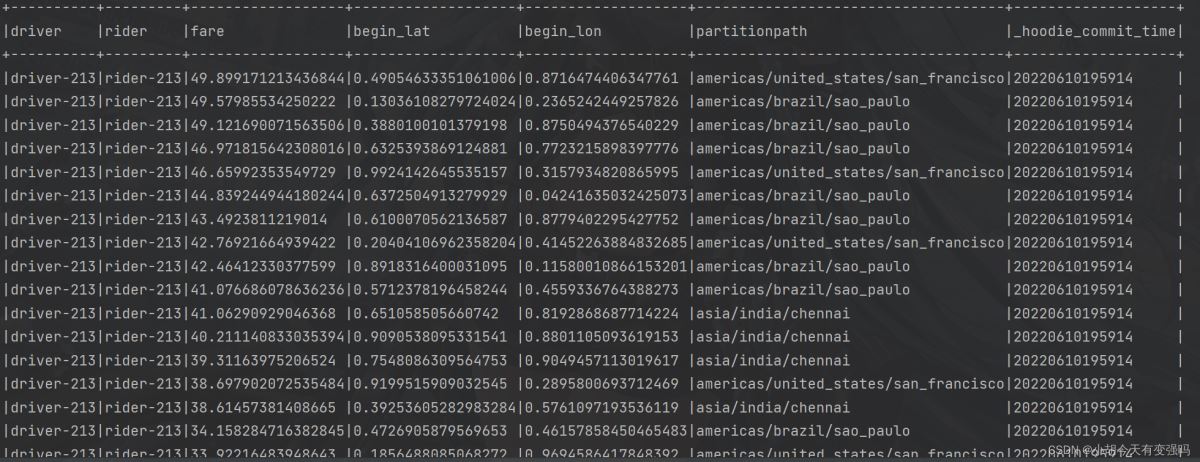
执行 insertData(spark, tableName, tablePath) 方法后对其用快照查询的方式进行查询:
queryData(spark, tablePath)
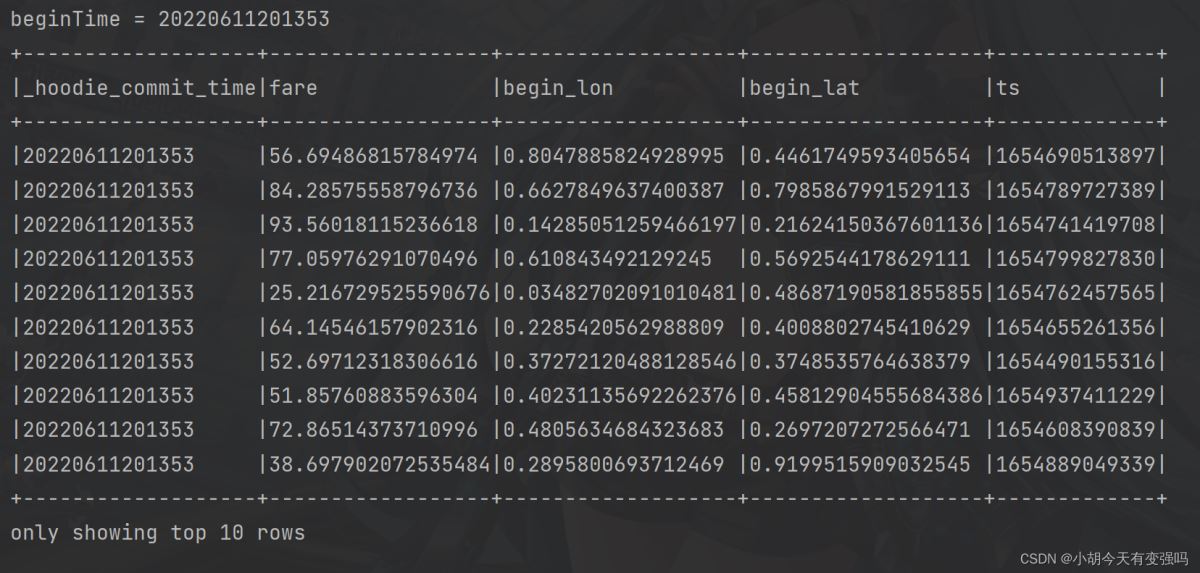
增量查询(Incremental Query)数据:
incrementalQueryData(spark, tablePath)
参考资料
https://www.bilibili.com/video/BV1sb4y1n7hK?p=21&vd_source=e21134e00867aeadc3c6b37bb38b9eee
到此这篇关于IDEA 中使用 Hudi的文章就介绍到这了,更多相关IDEA 使用 Hudi内容请搜索Devmax以前的文章或继续浏览下面的相关文章希望大家以后多多支持Devmax!