今天我们来动手实现一款2048小游戏。这款游戏的精髓就玩家能够在于通过滑动屏幕合并相同数字,直到不能再合并为止。玩法可以说是非常的简单,但挑战性也是十足的。话不多说,让我们从0开始实现!
目标效果
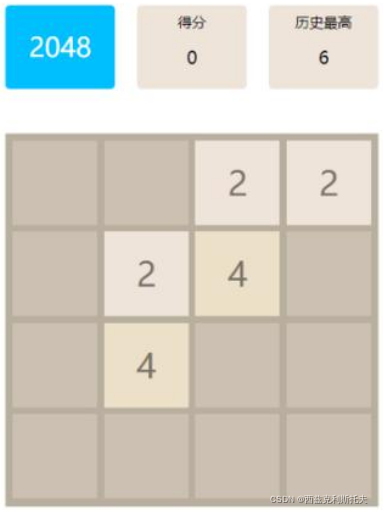
大致要实现的效果如下:
设计开始
首先简单分析一下游戏的逻辑:
- 输入移动方向,游戏内所有方块都朝指定方向移动
- 同方向移动的方块,数字相同则合并,然后生成一个合并的方块
- 合并后生成新的方块,无法生成新方块时游戏结束
- 用一系列的颜色来区分不同分数的方块(可有可无,纯粹是为了美观)
ok,游戏内再逻辑已经很清晰了。现在开始实现:
步骤一
新建一个文件夹用来放需要的游戏素材
步骤二
新建一个python程序,可以命名为2048,放在素材目录的同级文件夹下
步骤三
导入需要的依赖库:
import pygame as py
import sys, random, time, redis, os,math
import numpy as np
依赖库中的redis是一个额外的数据库,用来存取游戏历史数据,需要的可以考虑安装,不需要的用excel表代替也可以。
首先需要思考的是,游戏内的方块的移动本质上是坐标的变换,并且方块的坐标是固定的,也就是说,每次输入一个方向就按照一个移动函数将所有方块的坐标进行对应的转换。那么,如此以来,就需要建立一个坐标系用以标记方块的坐标。
因为是4x4的游戏,那么就按照(1,1),(1,2),(1,3),...,(4,4)建立游戏坐标,然而相比直接移动坐标还是比较麻烦,一个简单的想法是,每个方块给一个唯一的标记,如我们需要实现4x4的游戏,就需要16个记号。而每一个标记就对应了唯一且固定的坐标。给出如下代码:
# 预加载移动逻辑
def pre_move():
    numberPos = {}
    for num in range(1, 17):
        row1, row2 = divmod(num, 4)
        row = row1   np.sign(row2)
        column = [row2 if row2 != 0 else 4][0]
        numberPos['{}'.format([row, column])] = num
    return numberPos
这里的numberPos实际上就是{‘{1,1}’:1,’{1,2}‘:2......}。当然如果想设计5x5或者6x6的只需要把循环里面的17和4改成25和5或36和6就行。
ok,有了坐标接下来的问题好解决了。
步骤四
在新建的素材文件夹内放入一些图片方块(正方形)用来表示每个不同分数的方块。如下图所示:
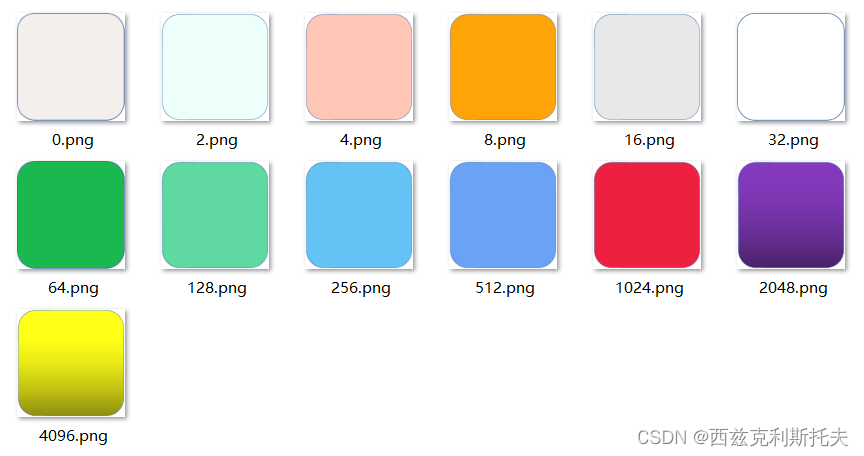
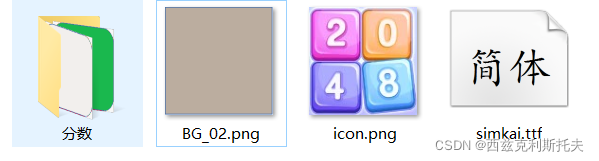
这里的颜色大家可以随意选择,只要不与游戏背景色太接近即可。在图片数量够多的情况下甚至能够实现颜色动态变换的方块,当然这都是后话,设定好每个分数的图片后,再设置一个背景用的图片,一个游戏图标用图片,一个字体,字体单独用来显示文字。
当然,不使用图片加载游戏也是可以的,如使用py.draw.rect()也能绘制图像,不过每次加载都绘制图像会占用游戏大量运算内存,并且使用图片可以自定义自己的游戏风格,修改上也非常便利。设置完成之后,定义一个游戏的初始化模块:
# 主程序
def game_start():
    global screen, rate
    py.init()
    clock = py.time.Clock()
    screen_x = 500  # 请调到合适的大小
    screen_y = math.ceil(screen_x * rate / rate2)
    screen = py.display.set_mode((screen_x, screen_y), depth=32)
    py.display.set_caption("终极2048")
    BackGround = [251, 248, 239]  # 灰色
    Icon = py.image.load('./素材/icon.png').convert_alpha()
    py.display.set_icon(Icon)
    screen.fill(color=BackGround)
    # 主界面下设计
    width = math.floor(screen_x * rate)
    bgSecond = py.image.load('./素材/BG_02.png').convert_alpha()
    bgSecond = py.transform.smoothscale(bgSecond, (width, width))
    bgSecondRect = bgSecond.get_rect()
    bgSecondRect.topleft = math.floor(screen_x * (1 - rate) / 2), math.floor(screen_y * (1 - rate2))
游戏界面的大小请调节到合适的尺寸。接下来加载分数图片,以便游戏循环时随时可以调用。
# 预加载分数图
def pre_load_image(background):
    imageList = {}
    imagePath = './素材/分数/'
    image_filenames = [i for i in os.listdir(imagePath)]
    width = math.floor(background.width * (1 - internalWidth) / 4)
    for name in image_filenames:
        image = py.transform.smoothscale(py.image.load(imagePath   name).convert_alpha(), (width, width))
        imageList[name.replace('.png', '')] = image
    return imageList
# 加载分数图像
def draw_image(score_list, image_list, pos_list):
    for pos_num in score_list:
        score = score_list[pos_num]
        scoreSurf = BasicFont01.render('{}'.format(score), True, (0, 0, 0))
        scoreRect = scoreSurf.get_rect()
        if score <= 4096:
            image = image_list['{}'.format(score)]
        else:
            image = image_list['4096']
        imageRect = image.get_rect()
        imageRect.topleft = pos_list['{}'.format(pos_num)]
        scoreRect.center = imageRect.center
        screen.blit(image, imageRect)
        if score > 0:
            screen.blit(scoreSurf, scoreRect)
# 图像位置列表,表示为(x,y)
# 用于确定加载的分数图像的显示点位
def image_pos_list(background):
    pre_x = background.topleft[0]
    pre_y = background.topleft[-1]
    internalLong = math.ceil(internalWidth / 5 * background.width)
    imageLong = math.floor((1 - internalWidth) / 4 * background.width)
    posList = dict(zip(list(range(1, 17)), [''] * 16))
    for num in range(1, 17):
        row1, row2 = divmod(num, 4)
        row = row1   np.sign(row2)
        column = [row2 if row2 != 0 else 4][0]
        image_x = pre_x   internalLong * column   imageLong * (column - 1)
        image_y = pre_y   internalLong * row   imageLong * (row - 1)
        posList['{}'.format(num)] = (image_x, image_y)
    return posList
这里用了三个函数来加载游戏图片,分表表示:提取图片名保存到列表中,绘制游戏中的2,4,8等等数字在分数图片上。最后一个函数用于确定每个坐标在游戏界面的显示位置,并将其一一绑定。加载完成图像之后,就需要完成关键的移动逻辑,先上代码:
# 移动逻辑
def number_move(number_pos, move_input, score_list):
    values = list(number_pos.values())
    keys = list(number_pos.keys())
    numberPosReverse = dict(zip(values, keys))
    newScoreList = score_list.copy()
    oldScoreList = {}
    while newScoreList != oldScoreList:
        oldScoreList = newScoreList.copy()
        for num in range(1, 17):
            pos = eval(numberPosReverse[num])
            x, y = pos[0]   move_input[0], pos[1]   move_input[1]
            pos[0] = [x if 1 <= x <= 4 else pos[0]][0]
            pos[1] = [y if 1 <= y <= 4 else pos[1]][0]
            number = number_pos['{}'.format(pos)]
            oldNumberScore = newScoreList[num]
            nextNumberScore = newScoreList[number]
            syn = list(map(lambda x, y: abs(x) * abs(y), move_input, pos))
            # 0值移动
            if nextNumberScore == 0:
                newScoreList[number] = oldNumberScore
                newScoreList[num] = 0
            # 无法移动
            elif num == number:
                pass
            # 合并移动
            elif oldNumberScore == nextNumberScore and num != number:
                newScoreList[number] = 2 * oldNumberScore
                newScoreList[num] = 0
            # 边界移动
            elif oldNumberScore != nextNumberScore and 1 in syn or 4 not in syn:
                pass
            # 非边界移动
            elif oldNumberScore != nextNumberScore and 1 not in syn and 4 not in syn:
                x, y = pos[0]   move_input[0], pos[1]   move_input[1]
                next2NumberScore = newScoreList[number_pos['{}'.format([x, y])]]
                if next2NumberScore != nextNumberScore:
                    pass
                elif next2NumberScore == nextNumberScore:
                    newScoreList[number_pos['{}'.format([x, y])]] = 2 * next2NumberScore
                    newScoreList[number] = oldNumberScore
                    newScoreList[num] = 0
    return newScoreList
首先导入预先确定好的坐标,移动变量。根据前面分析的游戏逻辑,每次输入移动向量后游戏内的所有方块都需要移动,相同分数的方块需要一次性合并到一起,并且不能留空。详细分析一下就是:
- 输入一个移动向量(x,y),如( 1,0)表示方块向右移动一格。
- 对所有的原坐标进行计算并保留为移动后坐标,提取前后两次坐标对应的分数
- 从1号标记开始循环判断:
- 0值移动:如果移动后的分数为0,用旧坐标分数替代新坐标的分数,并删除旧坐标的分数
- 无法移动:移动后的坐标与移动前的坐标相同,那么不做改变
- 合并移动:新旧坐标对应的分数相同,那么新坐标分数x2,旧坐标分数删除
- 边界移动:方块已经处于移动的边界,无法移动,不做修改
- 非边界移动:新旧坐标对应的分数不同,且新坐标的下一个坐标对应的分数也不同,不做修改;新旧坐标对应的分数不同,且新坐标的下一个坐标对应的分数相同,修改
- 循环整个逻辑,直到所有坐标对应的分数不再发生改变
通过上述分析,移动逻辑函数实现了输入一个方向游戏内的分数动态发生变化。最后我们还需要一个游戏结束的函数:
# 游戏结束
def game_over(score,bg):
    ip = '127.0.0.1'
    password = None
    r = redis.Redis(host=ip, password=password, port=6379, db=2, decode_responses=True)
    r.hset('2048','{}'.format(time.localtime()),score)
    py.draw.rect(screen,bg,[0,0,screen.get_width(),screen.get_height()],0)
    BasicFont02 = py.font.SysFont('/素材/simkai.ttf', 40)
    overSurf = BasicFont01.render('Game Over', True, (0, 0, 0))
    overRect = overSurf.get_rect()
    overRect.center = (math.floor(screen.get_width() / 2), math.floor(screen.get_height() / 2))
    scoreSurf = BasicFont02.render('最终得分:', True, (0, 0, 0))
    scoreRect = scoreSurf.get_rect()
    scoreRect.center = (math.floor(screen.get_width() / 2), math.floor(screen.get_height() * 0.6))
    numberSurf = BasicFont02.render('{}'.format(score), True, (0, 0, 0))
    numberRect = numberSurf.get_rect()
    numberRect.center = (math.floor(screen.get_width() / 2), math.floor(screen.get_height() * 0.7))
    time.sleep(3)
    sys.exit()
一个键盘控制代码,实现键盘控制游戏:
# 键盘控制函数
def keyboard_ctrl(event):
    move_output = [0, 0]
    if event.key == py.K_UP:
        move_output = [-1, 0]
    elif event.key == py.K_DOWN:
        move_output = [1, 0]
    elif event.key == py.K_RIGHT:
        move_output = [0, 1]
    elif event.key == py.K_LEFT:
        move_output = [0, -1]
    return move_output
一个新方块生成器,实现每次合并之后能在空白方块处随机生成2或4中的一个新分数,生成概率按照当前游戏中的2和4的数量为基础。
# 随机得分生成
def random_score(score_list):
    values = list(score_list.values())
    pro = [2] * (2   values.count(2))   [4] * (1   values.count(4))  # 以当前分数图中2或4出现的频率为概率
    blank = [[i if score_list[i] == 0 else 0][0] for i in range(1, 17)]
    blank = list(set(blank))
    blank.remove(0)
    if not blank:
        return 'GameOver'  # 游戏结束
    else:
        score_list[random.choice(blank)] = random.choice(pro)
        return score_list
一个得分统计器,每次游戏运行是统计当前得分和历史最高得分:
# 统计并记录当前得分
def record_score(score_list, background):
    totalScore = 0
    values = list(score_list.values())
    for i in values: totalScore  = i
    scoreSurf = BasicFont01.render('得分:{}'.format(totalScore), True, (0, 0, 0))
    scoreRect = scoreSurf.get_rect()
    scoreRect.topleft = (math.floor(0.1 * screen.get_width()), math.floor(0.05 * screen.get_height()))
    scoreRect.width = math.floor((rate - 0.15) / 2 * screen.get_width())
    scoreRect.height = math.floor((1 - rate2) / 3 * 2 * screen.get_height())
    py.draw.rect(screen, background, [scoreRect.topleft[0], scoreRect.topleft[1], scoreRect.width, scoreRect.height], 0)
    screen.blit(scoreSurf, scoreRect)
    return totalScore
# 绘制历史最高得分
def draw_best(background):
    ip = '127.0.0.1'
    password = None
    r = redis.Redis(host=ip, password=password, port=6379, db=2, decode_responses=True)
    scores=[eval(i) for i in list(r.hgetall('2048').values())]
    best_scores=max(scores)
    scoreSurf=BasicFont01.render('最高得分:{}'.format(best_scores),True,(0,0,0))
    scoreRect=scoreSurf.get_rect()
    scoreRect.width = math.floor((rate - 0.15) / 2 * screen.get_width())
    scoreRect.height = math.floor((1 - rate2) / 3 * 2 * screen.get_height())
    scoreRect.topright = (math.floor(0.9 * screen.get_width()), math.floor(0.05 * screen.get_height()))
    py.draw.rect(screen, background, [scoreRect.topleft[0], scoreRect.topleft[1], scoreRect.width, scoreRect.height], 0)
    screen.blit(scoreSurf, scoreRect)
最后补充完整的游戏启动器:
# 主程序
def game_start():
    global screen, rate
    py.init()
    clock = py.time.Clock()
    screen_x = 500  # 请调到合适的大小
    screen_y = math.ceil(screen_x * rate / rate2)
    screen = py.display.set_mode((screen_x, screen_y), depth=32)
    py.display.set_caption("终极2048")
    BackGround = [251, 248, 239]  # 灰色
    Icon = py.image.load('./素材/icon.png').convert_alpha()
    py.display.set_icon(Icon)
    screen.fill(color=BackGround)
    # 主界面下设计
    width = math.floor(screen_x * rate)
    bgSecond = py.image.load('./素材/BG_02.png').convert_alpha()
    bgSecond = py.transform.smoothscale(bgSecond, (width, width))
    bgSecondRect = bgSecond.get_rect()
    bgSecondRect.topleft = math.floor(screen_x * (1 - rate) / 2), math.floor(screen_y * (1 - rate2))
    # 主界面上部分设计
    # 预加载数据
    draw_best(BackGround)
    posList = image_pos_list(bgSecondRect)
    imageList = pre_load_image(bgSecondRect)
    scoreList = dict(zip(list(range(1, 17)), [0] * 15   [2]))  # 分数表
    numberPos = pre_move()
    scoreList = random_score(scoreList)
    totalScore=0
    # 主循环
    while True:
        screen.blit(bgSecond, bgSecondRect)  # 刷新屏幕
        if scoreList == 'GameOver':
            game_over(totalScore,BackGround)
        draw_image(scoreList, imageList, posList)  # 绘制得分
        totalScore = record_score(scoreList, BackGround)
        key = py.key.get_pressed()
        if key[py.K_ESCAPE]: exit()
        for event in py.event.get():
            if event.type == py.QUIT:
                sys.exit()
            elif event.type == py.KEYDOWN:
                move_input = keyboard_ctrl(event)  # 按下按键
                scoreList = number_move(numberPos, move_input, scoreList)  # 移动数字
                scoreList = random_score(scoreList)  # 在按下按键后生成新的数字
        py.display.update()
        clock.tick(FPS)
if __name__ == '__main__':
    py.font.init()
    BasicFont01 = py.font.Font('./素材/simkai.ttf', 30)
    screen = py.display.set_mode((500, 500))
    rate = 0.95  # 游戏主界面下的宽度占整个游戏界面宽度的比例
    rate2 = 0.7  # 游戏主界面下的高度占整个游戏界面高度的比例
    internalWidth = 0.1  # 间隙比例
    FPS = 50  # 游戏帧率
    game_start()
步骤五
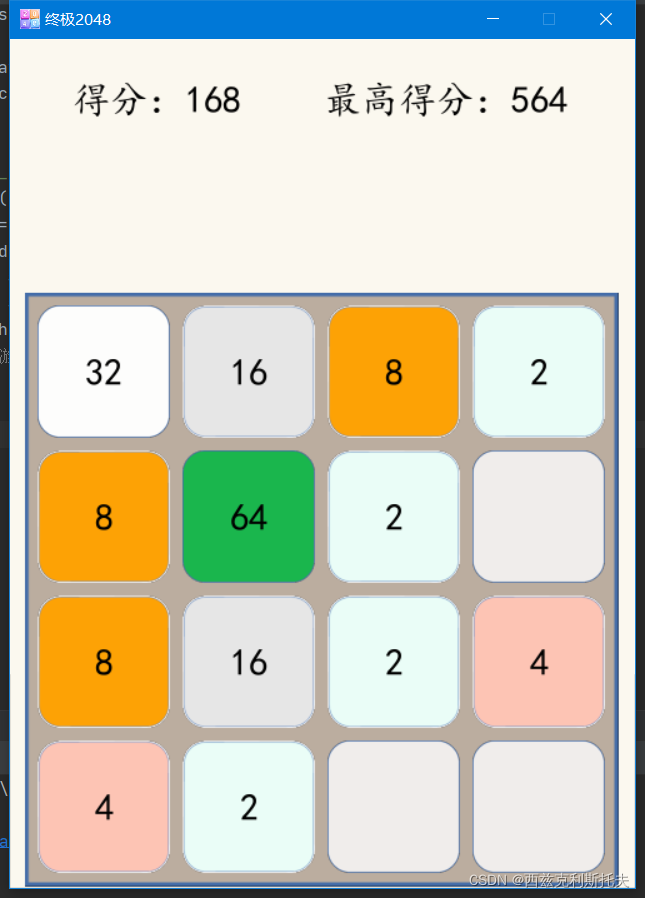
启动游戏
运行之前别忘了启动redis服务器。运行效果图:(游戏界面设计的不够好。。。。,本来打算再加入一些小道具比如说:撤销,全屏合并等功能)
写在最后:有时间的话考虑再做一个菜单界面。最后给个懒人包:2048提取码:utfu
到此这篇关于Python制作简易版2048小游戏的文章就介绍到这了,更多相关Python 2048内容请搜索Devmax以前的文章或继续浏览下面的相关文章希望大家以后多多支持Devmax!