本文实例为大家分享了Android实现秒表功能的具体代码,供大家参考,具体内容如下
设计完成一个秒表,具备启停功能,正确使用工作线程完成界面刷新
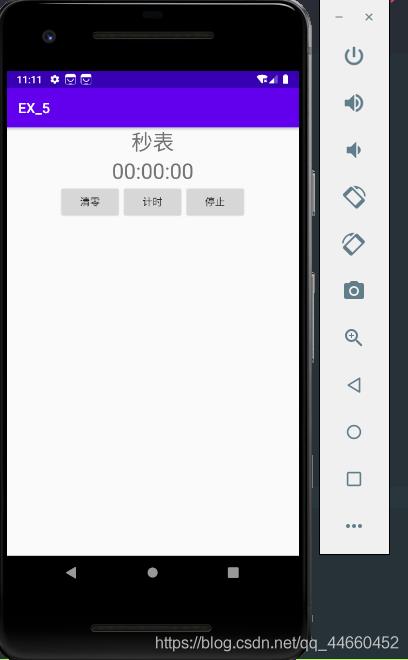
activity_main.xml
<?xml version="1.0" encoding="utf-8"?>
<LinearLayout xmlns:android="http://schemas.android.com/apk/res/android"
    xmlns:app="http://schemas.android.com/apk/res-auto"
    android:layout_width="match_parent"
    android:layout_height="match_parent"
    android:orientation="vertical">

   <LinearLayout
       android:layout_width="match_parent"
       android:layout_height="wrap_content"
       android:orientation="horizontal"
       android:gravity="center">

       <TextView
           android:layout_width="wrap_content"
           android:layout_height="wrap_content"
           android:gravity="center"
           android:text="秒表"
           android:textSize="30sp" />
   </LinearLayout>
    <LinearLayout
        android:layout_width="match_parent"
        android:layout_height="wrap_content"
        android:gravity="center">

        <TextView
            android:layout_width="wrap_content"
            android:layout_height="wrap_content"
            android:gravity="center"
            android:text="@string/_00_00_00"
            android:textSize="30sp"
            android:id="@ id/clock" />
    </LinearLayout>
    <LinearLayout
        android:layout_width="wrap_content"
        android:layout_height="wrap_content"
        android:orientation="horizontal"
        android:layout_gravity="center">

        <Button
            android:layout_width="wrap_content"
            android:layout_height="wrap_content"
            android:text="清零"
            android:id="@ id/init" />

        <Button
            android:layout_width="wrap_content"
            android:layout_height="wrap_content"
            android:text="计时"
            android:id="@ id/start" />

        <Button
            android:layout_width="wrap_content"
            android:layout_height="wrap_content"
            android:text="停止"
            android:id="@ id/stop" />
    </LinearLayout>


</LinearLayout>
AndroidManifest.xml
将activity,service在AndoidMainfest.xml中注册
<?xml version="1.0" encoding="utf-8"?>
<manifest xmlns:android="http://schemas.android.com/apk/res/android"
    package="com.example.ex_5">

    <application
        android:allowBackup="true"
        android:icon="@mipmap/ic_launcher"
        android:label="@string/app_name"
        android:roundIcon="@mipmap/ic_launcher_round"
        android:supportsRtl="true"
        android:theme="@style/AppTheme">
        <activity android:name=".MainAActivity">
            <intent-filter>
                <action android:name="android.intent.action.MAIN" />

                <category android:name="android.intent.category.LAUNCHER" />
            </intent-filter>
        </activity>
        <service android:name=".TimeService">

        </service>
    </application>

</manifest>
Timeservice.java
service服务
package com.example.ex_5;

import android.app.Service;
import android.content.Intent;
import android.os.IBinder;
import android.util.Log;
import androidx.annotation.Nullable;
import java.util.Date;

public class TimeService extends Service {
    @Nullable

    private Date startTime = new Date();
    private long diff;
    public Thread workThread;

    private Runnable backGroundWork = new Runnable() {
        @Override
        public void run() {
            while(!Thread.interrupted()){
                Date endTime = new Date();
                diff = endTime.getTime()-startTime.getTime();
                MainActivity.UpdateGUI(diff);
                Log.i("TimeService:The diff is",String.valueOf(diff));
                try {
                    Thread.sleep(0);
                } catch (InterruptedException e) {
                    e.printStackTrace();
                }
            }
        }
    };

    @Override
    public void onCreate() {
        super.onCreate();
        Log.i("TimeService","onCreate");
        workThread=new Thread(null,backGroundWork,"workThread");
    }

    @Override
    public void onStart(Intent intent, int startId) {
        super.onStart(intent, startId);
        if(!workThread.isAlive()){
            workThread.start();
        }
        Log.i("TimeService","onStart");
    }

    @Override
    public void onDestroy() {
        super.onDestroy();
        MainActivity.UpdateGUI(0);
        MainActivity.UpdateDiff(diff);
        workThread.interrupt();
        Log.i("TimeService","onDestroy");

    }


    public IBinder onBind(Intent intent) {
        return null;
    }
}
MainActivity.java
注册按钮响应事件,更新UI界面
package com.example.ex_5;

import android.content.Intent;
import android.os.Bundle;
import android.os.Handler;
import android.util.Log;
import android.view.View;
import android.widget.Button;
import android.widget.TextView;

import androidx.appcompat.app.AppCompatActivity;

import java.net.ServerSocket;

public class MainActivity extends AppCompatActivity {
    private static Handler handler = new Handler();
    private static TextView labelView = null;
    private static String time;
    private static long _diff = 0;


//更新界面
    public static void UpdateGUI(long diff) {
        diff  = _diff;
        int hours = (int) diff / (1000 * 60 * 60);
        int minutes = (int) (diff - (hours * (1000 * 60 * 60))) / (1000 * 60);
        int seconds = (int) (diff - (hours * (1000 * 60 * 60)) - (minutes * (1000 * 60))) / 1000;
        time = hours   ":"   minutes   ":"   seconds;
        handler.post(RefreshLable);
    }
//供停止功能使用,用于记录服务结束之时的时间
    public  static void UpdateDiff(long diff){
        _diff = diff;
    }
//setText
    public static Runnable RefreshLable = new Runnable() {
        @Override
        public void run() {
            labelView.setText(time);
        }
    };


    protected void onCreate(Bundle savedInstanceState) {
        super.onCreate(savedInstanceState);
        setContentView(R.layout.activity_main);
        Button initButton = findViewById(R.id.init);
        final Button startButton = findViewById(R.id.start);
        Button stopButton = findViewById(R.id.stop);
        labelView = findViewById(R.id.clock);

        final Intent serviceIntent = new Intent(this, TimeService.class);
        startButton.setOnClickListener(new Button.OnClickListener() {

            public void onClick(View view) {
                Log.i("MainActivity","ClickStartButton");
                startService(serviceIntent);
            }
        });
        stopButton.setOnClickListener(new Button.OnClickListener(){

            @Override
            public void onClick(View v) {
                Log.i("the behead diff is",String.valueOf(_diff));
                Log.i("MainActivity","ClickStopButton");
                stopService(serviceIntent);
            }
        });
        initButton.setOnClickListener(new Button.OnClickListener(){
            @Override
            public void onClick(View v) {
                Log.i("MainActivity","ClickInitButton");
                _diff = 0;
                String text = "00:00:00";
                labelView.setText(text);
                stopService(serviceIntent);
            }
        });
    }


}
以上就是本文的全部内容,希望对大家的学习有所帮助,也希望大家多多支持Devmax。